2011-2018 Honda Odyssey Cable Repair Instructions
If you did not purchase from THANOSZX7R on eBay.com, CarCableguy on Amazon.com, or from CarCableGuy.com you purchased counterfeit items from low quality Chinese manufacturing that is violating our copyright images and texts on this website. Please help us in limiting the low quality products and report them as counterfeit in Amazon or eBay and demand your money back.
-
Model
2011-2018
Scroll Down for All the Instructions


Please Follow all the Instructions

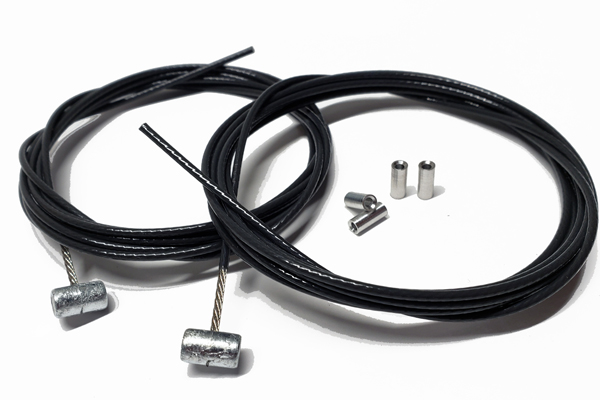
Enclosed in the kit is:
1 (one) long steel cable
1 (one) short steel cable
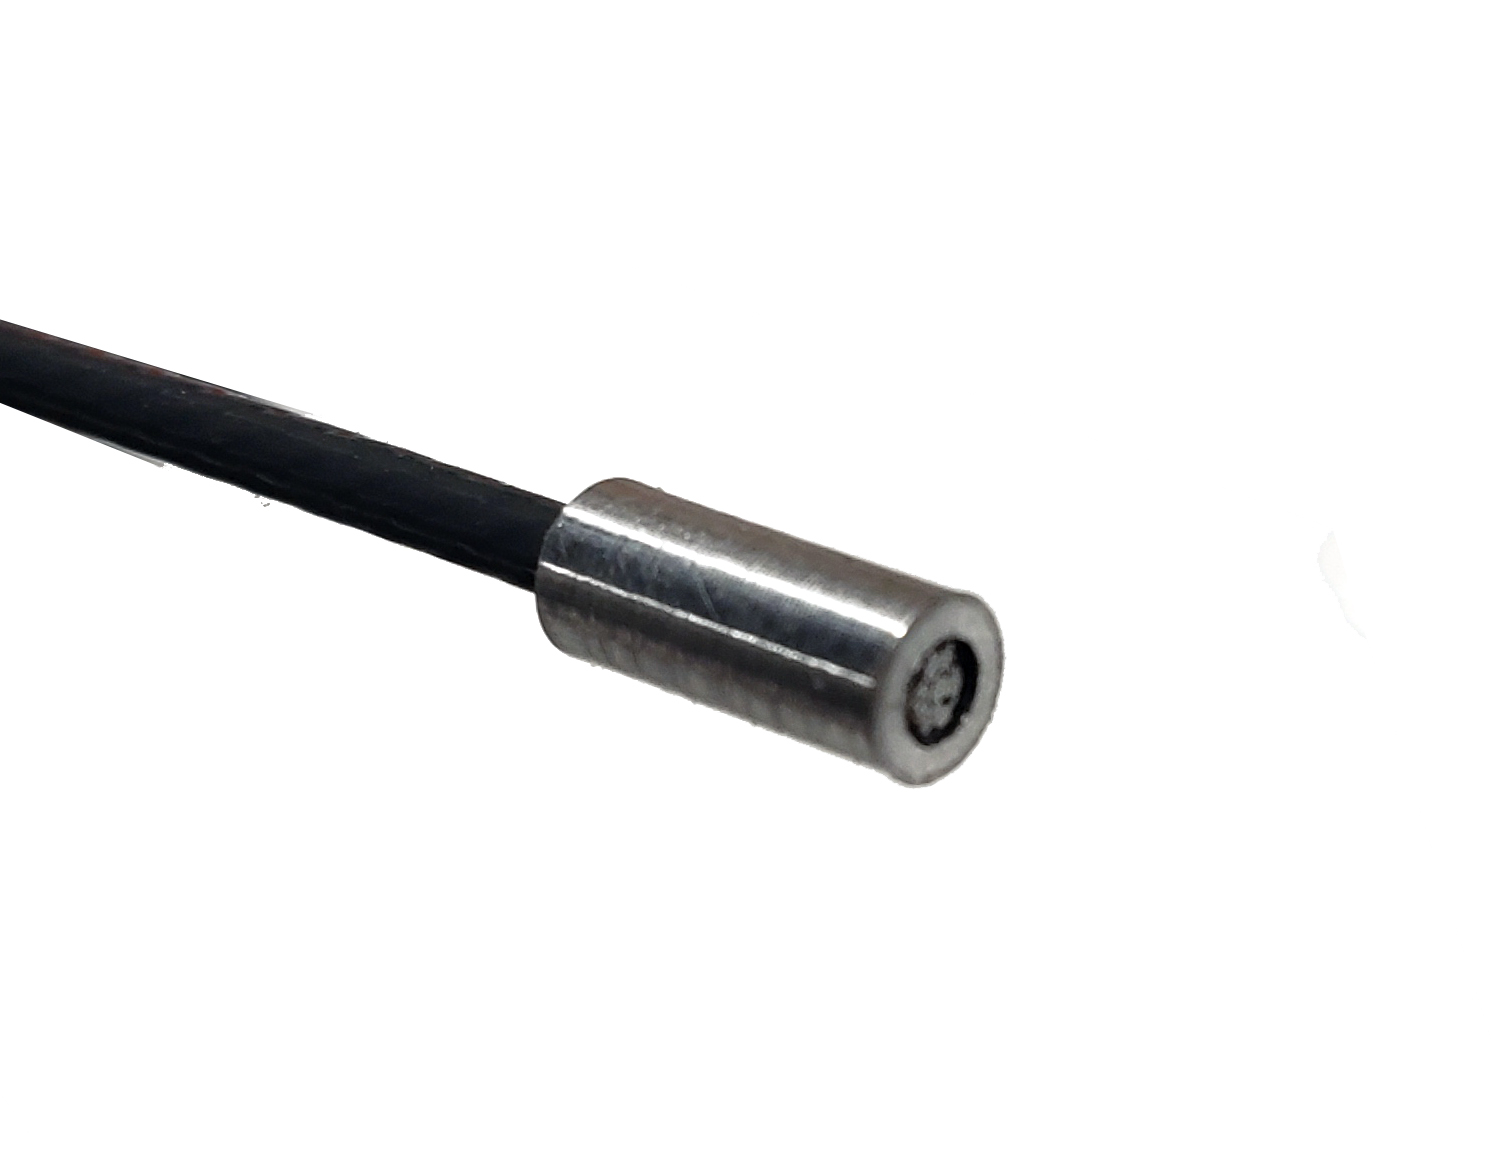
3 (Three) crimp ends CNC machined from aerospace aluminum (6061-T6)
Please follow these instructions carefully in order to ensure a proper repair that will continue to function for years to come.
Additional tools required:
Crimping tools find a link above in the "Links to Needed Tools" above
We recommed the Klein brand for price and quality, but crimp hard. See the link above.
We also recommend replacing the bracket that holds the door on at the middle of the rear of the door. Links to purchase the Passenger's Side and Driver's Side. If you shop elsewhere make sure you get the correct side.

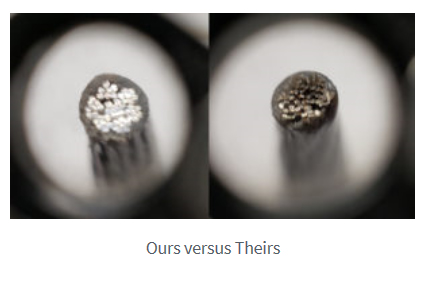
Under 10x magnification you can see the cables in ours are wound in 7x7 pattern with an organized bright distinct difference. Our cables can hold 300 pounds (136 Kilos)
If we can’t guarantee it, we won’t sell it.
OUR STAINLESS STEEL CABLE IS MANUFACTURED BY TITAN AEROSPACE,
not from the home supply center.
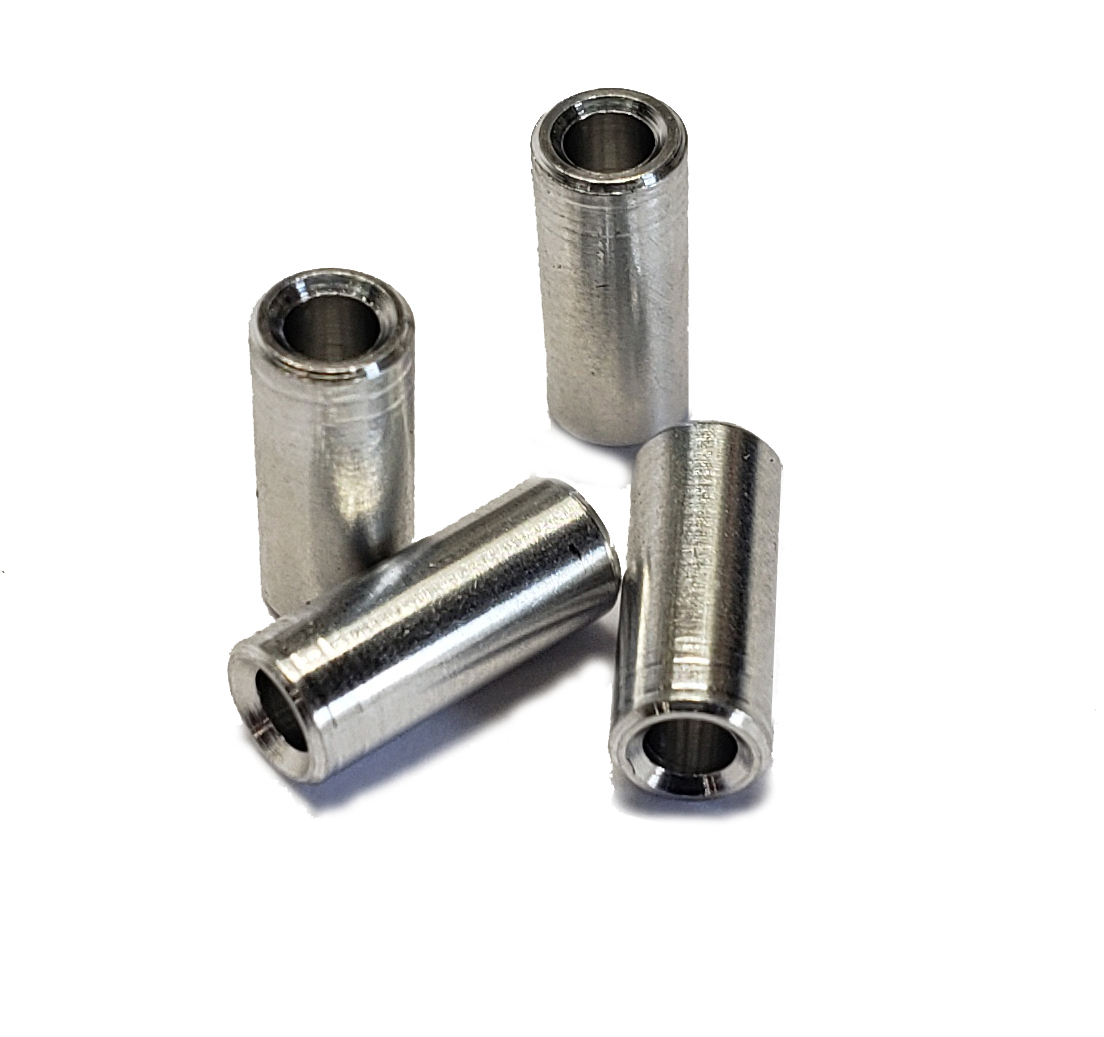
Our crimp ends are CNC machined from aerospace aluminum (6061-T6)
manufactured to the highest
specifications with chamfered ends for easy
fitment,
not cheap hobby tubing.
We also recommend inspecting the bracket that holds the door on at the middle of the rear of the door. Links to purchase the Passenger's Side and Driver's Side. If you shop elsewhere make sure you get the correct side.
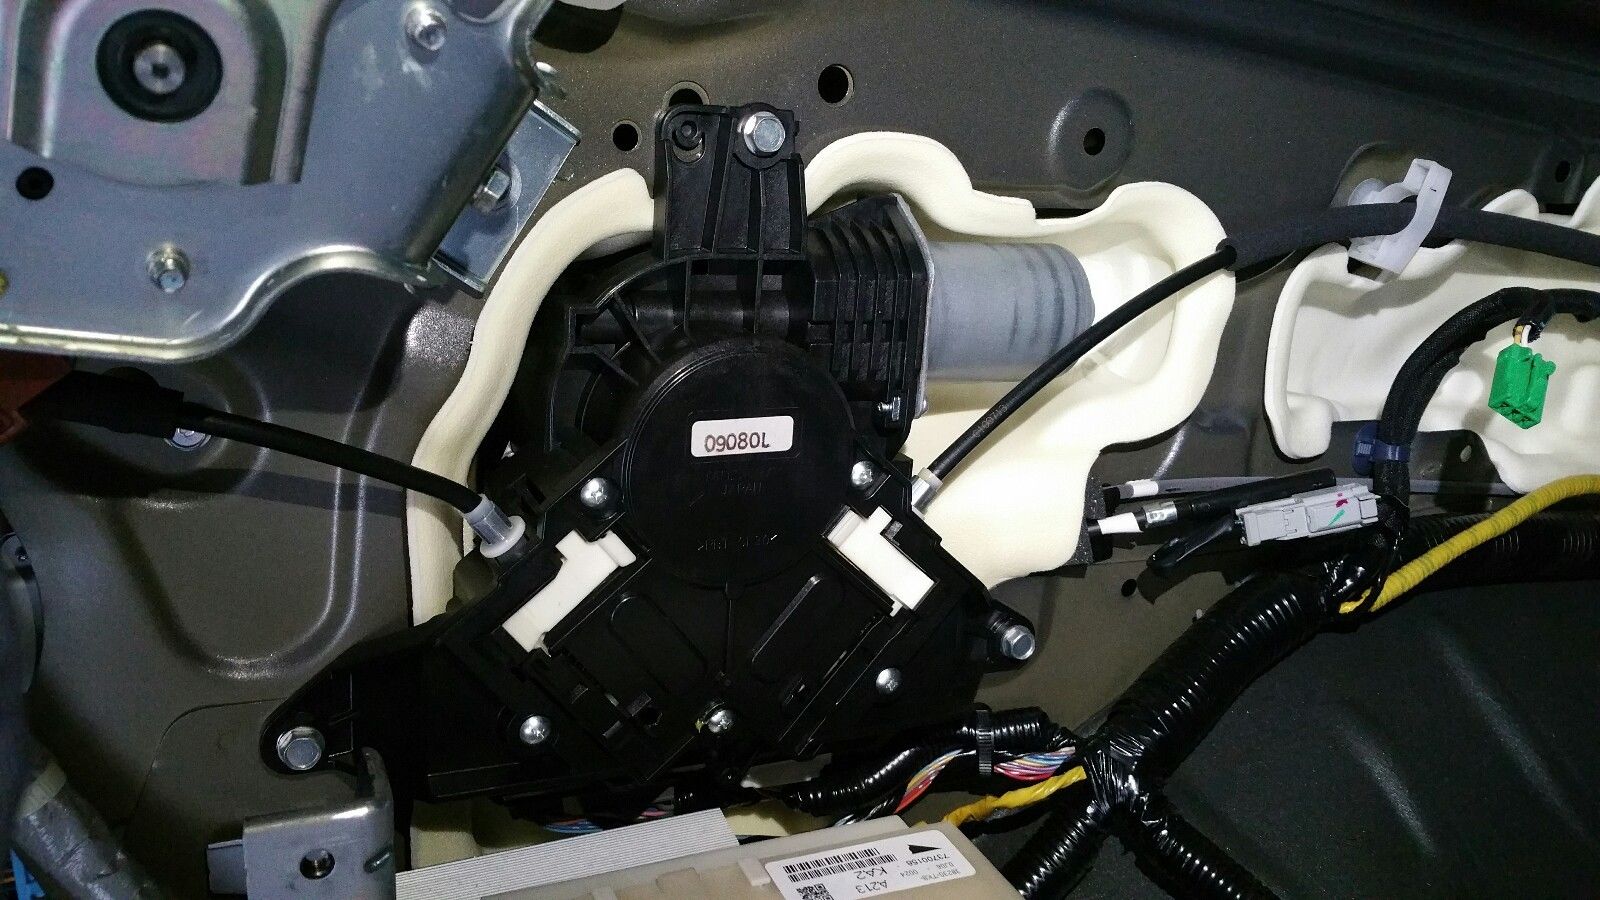
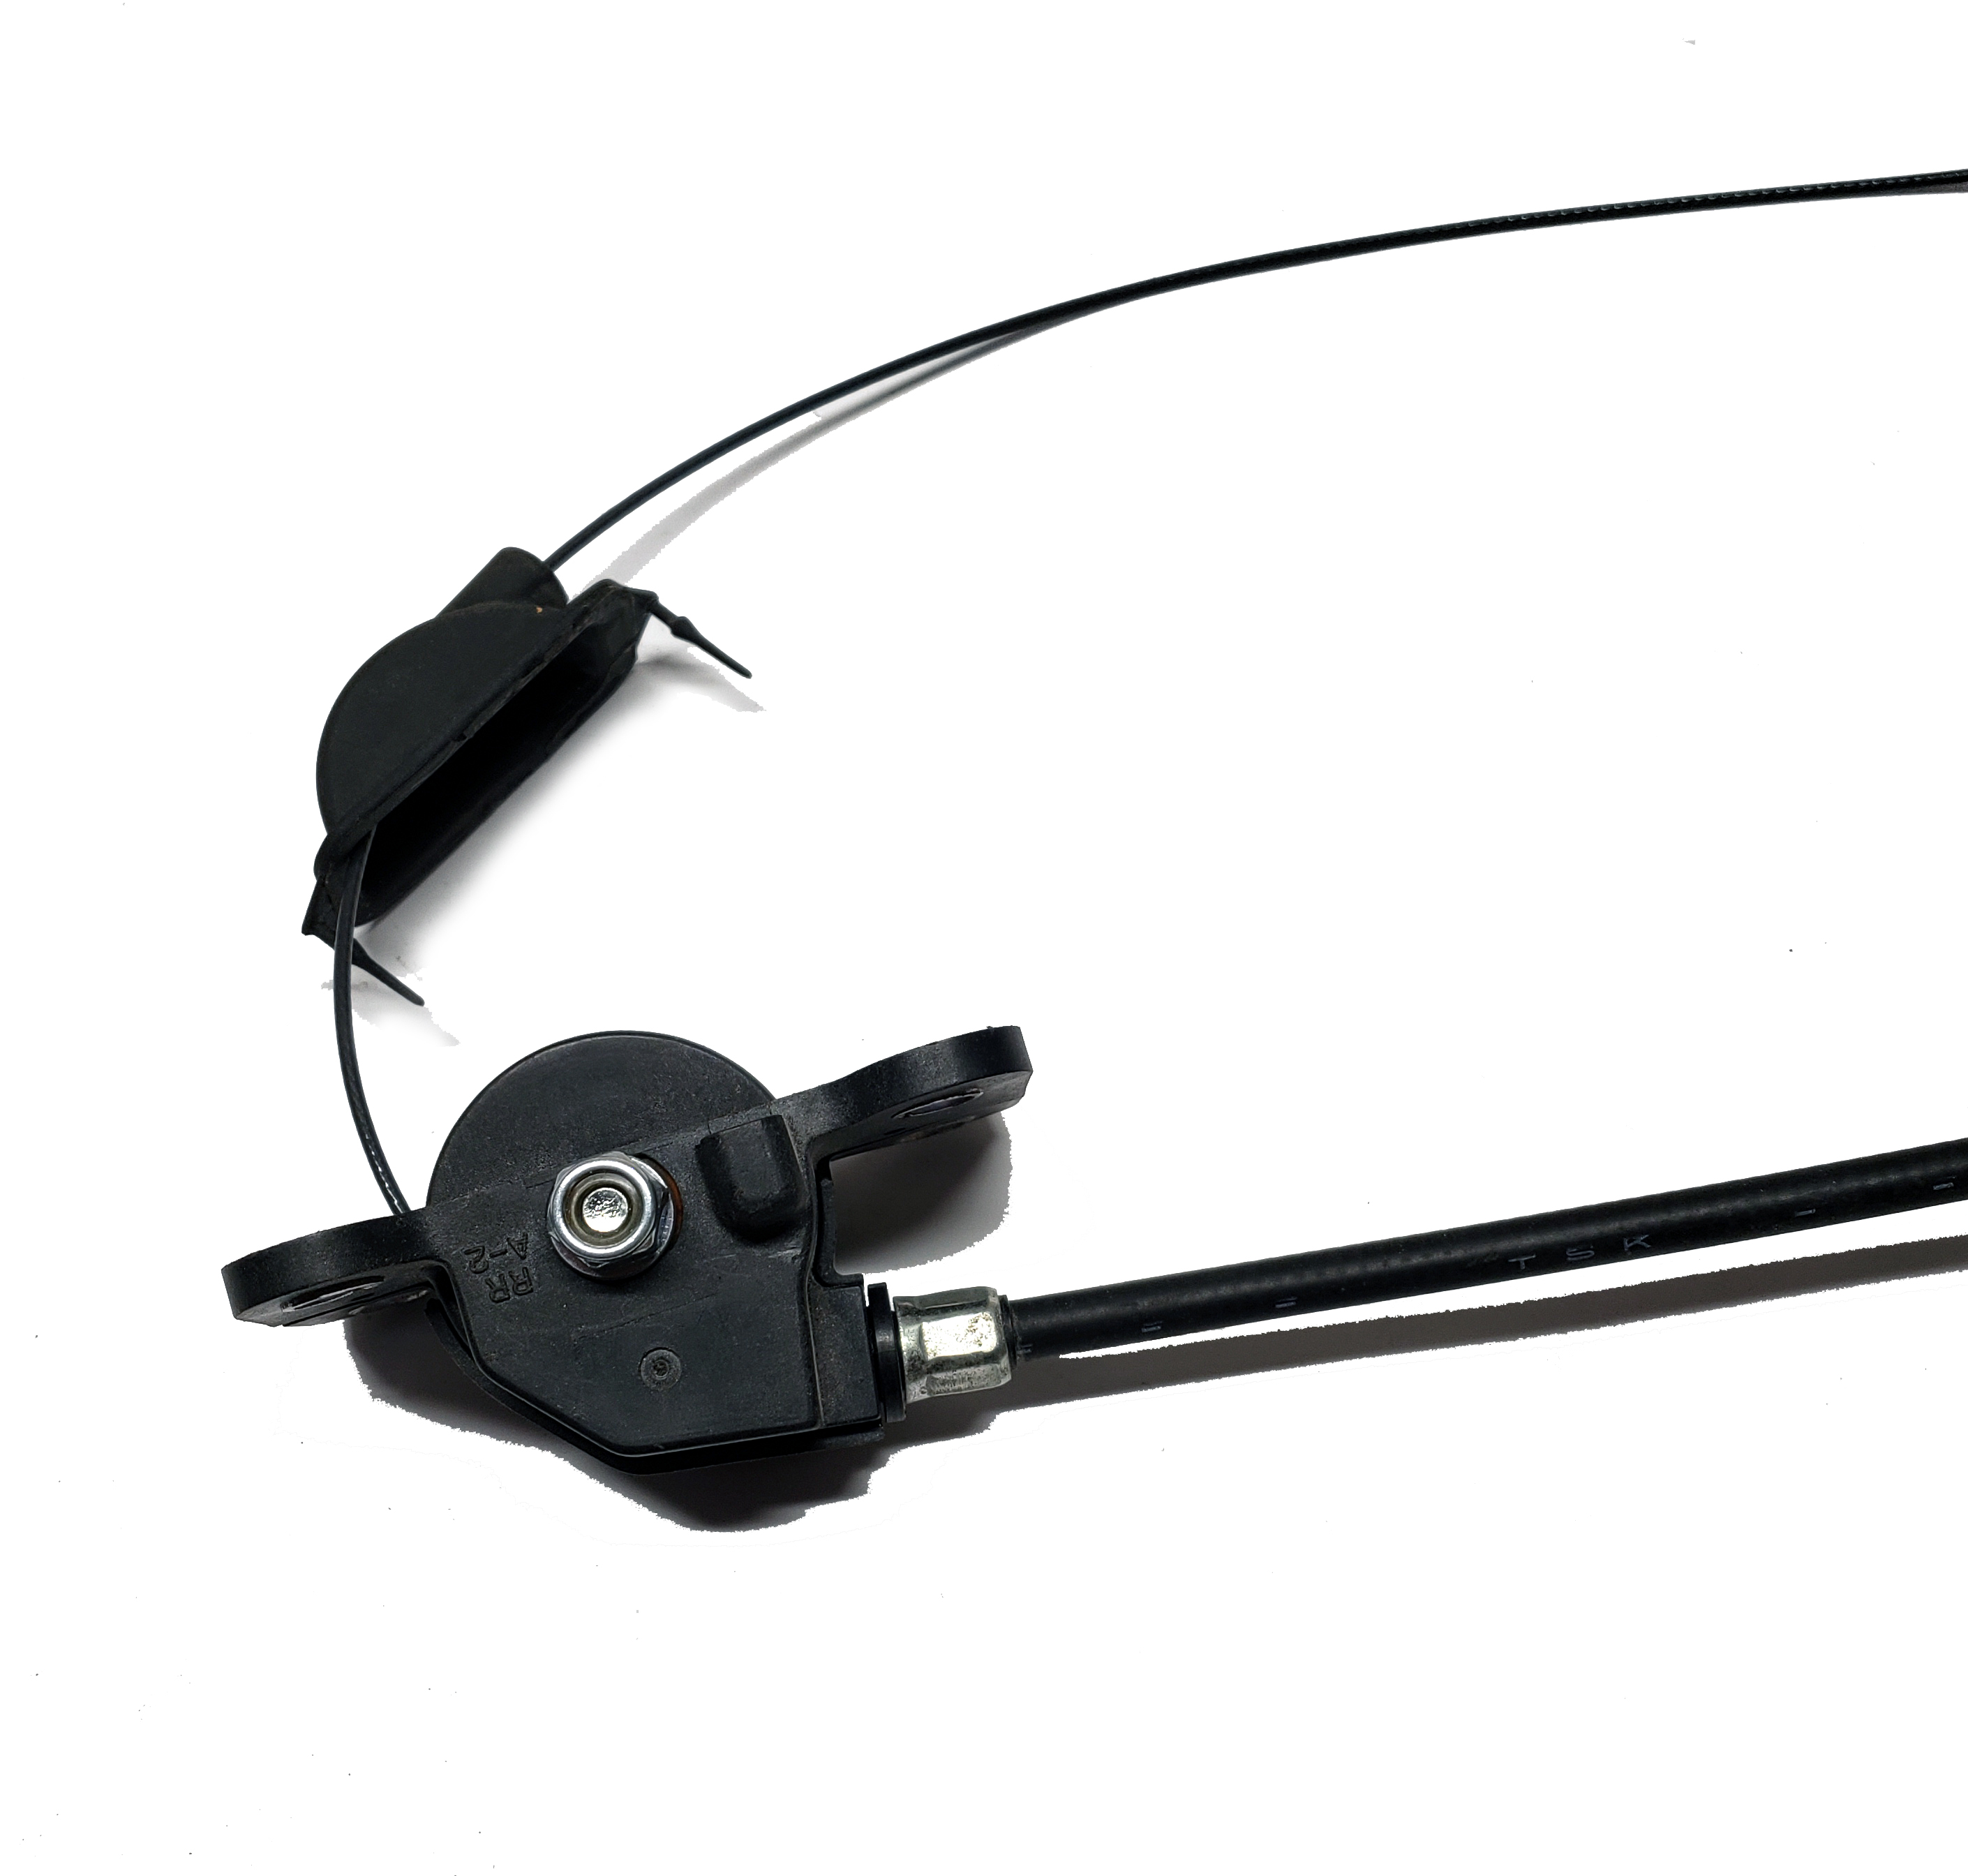
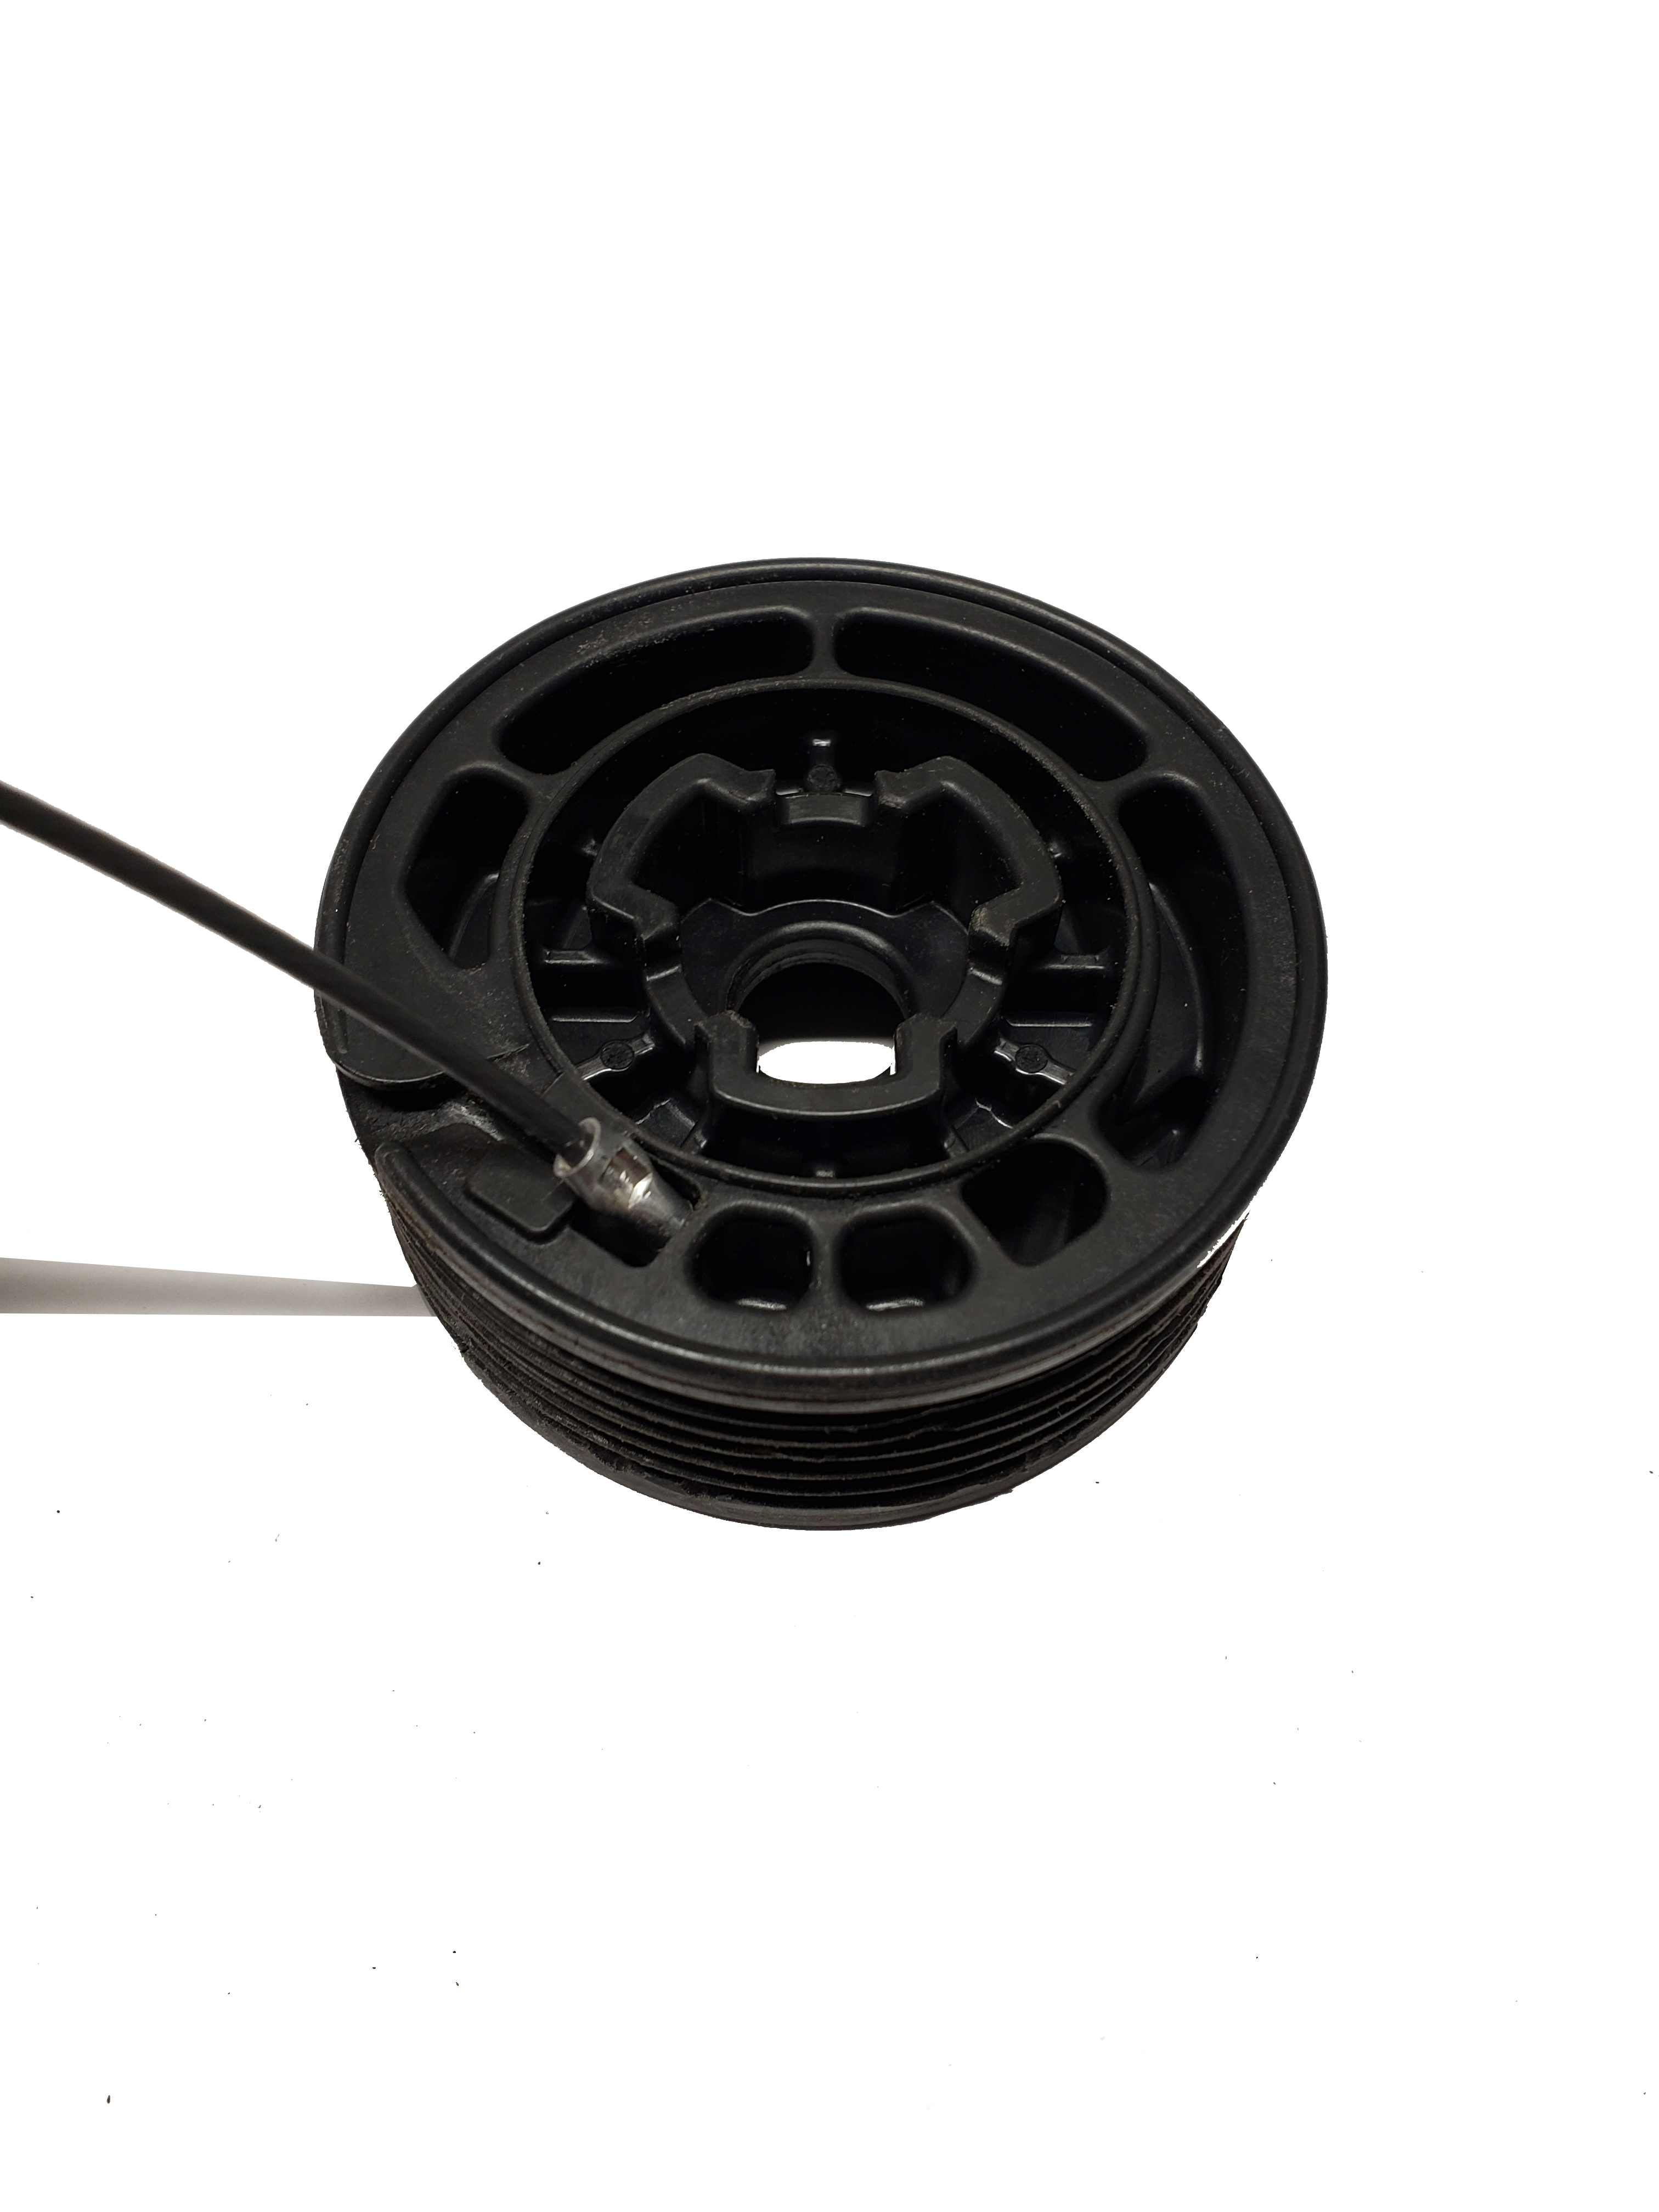
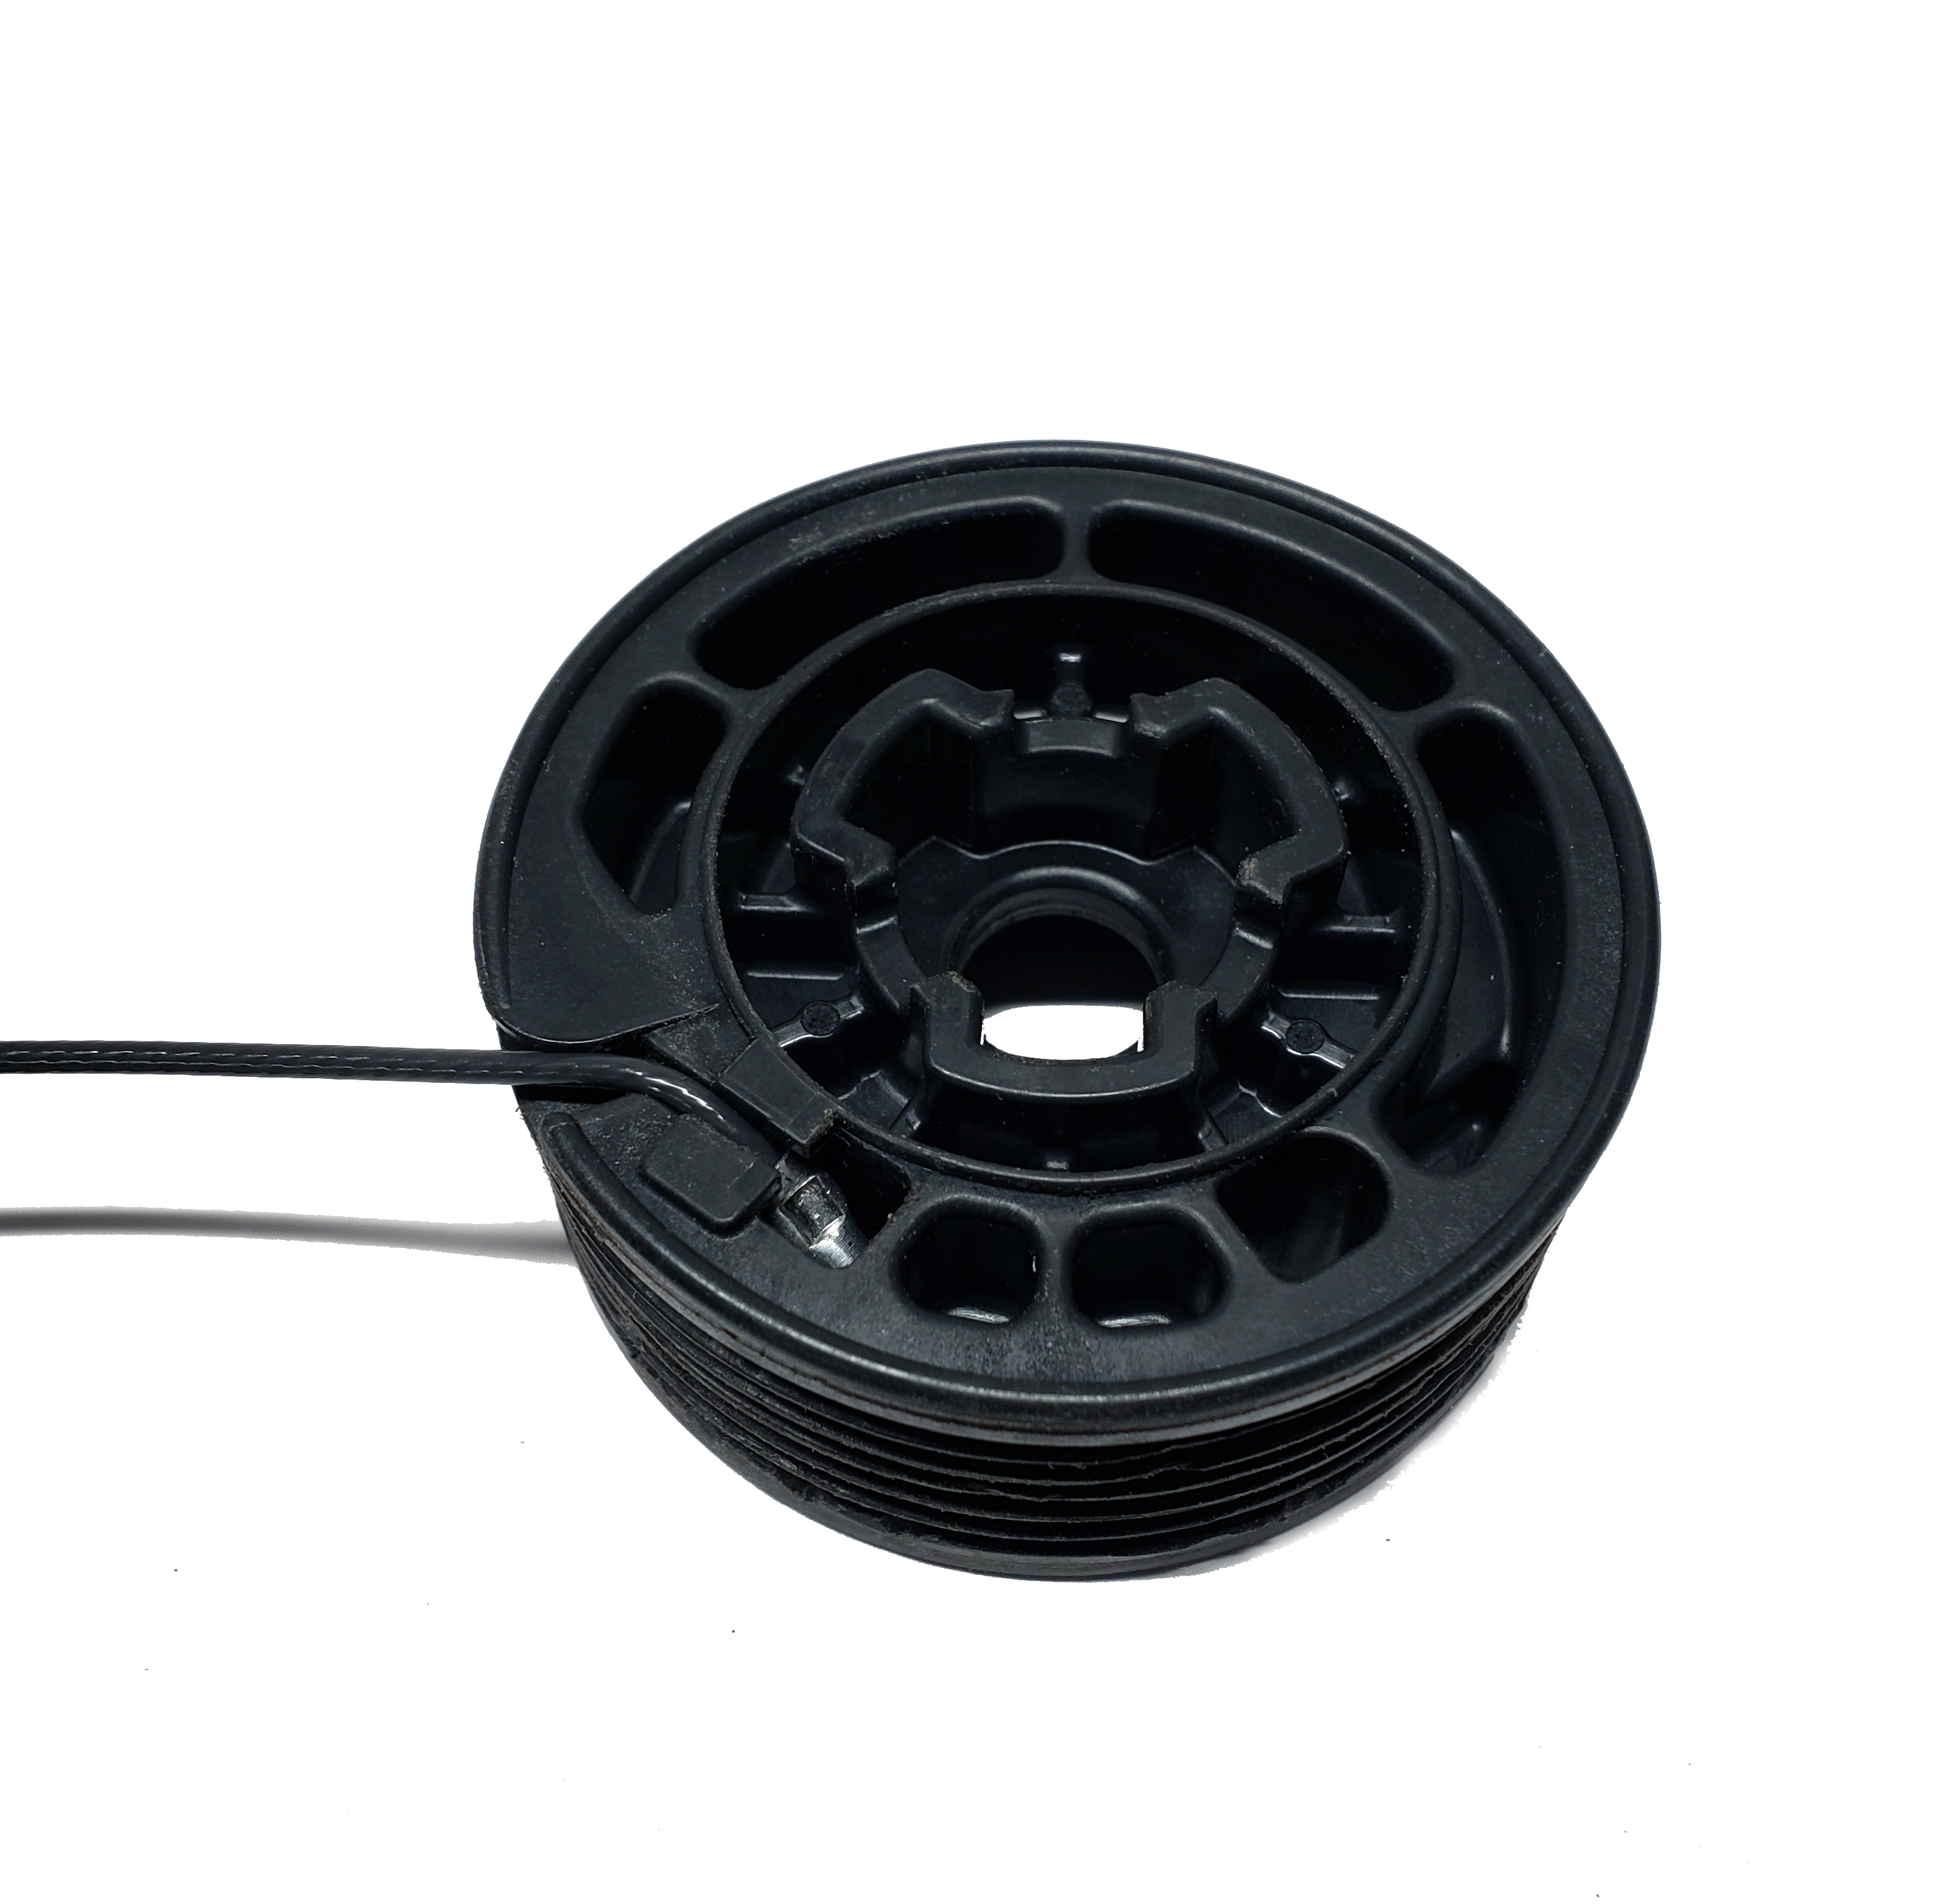
First you need to get to your pulley and determine if it is damaged. It is located in the motor in the side panel behind the door. The motor is the same for both sides. Removal of the motor is not required.
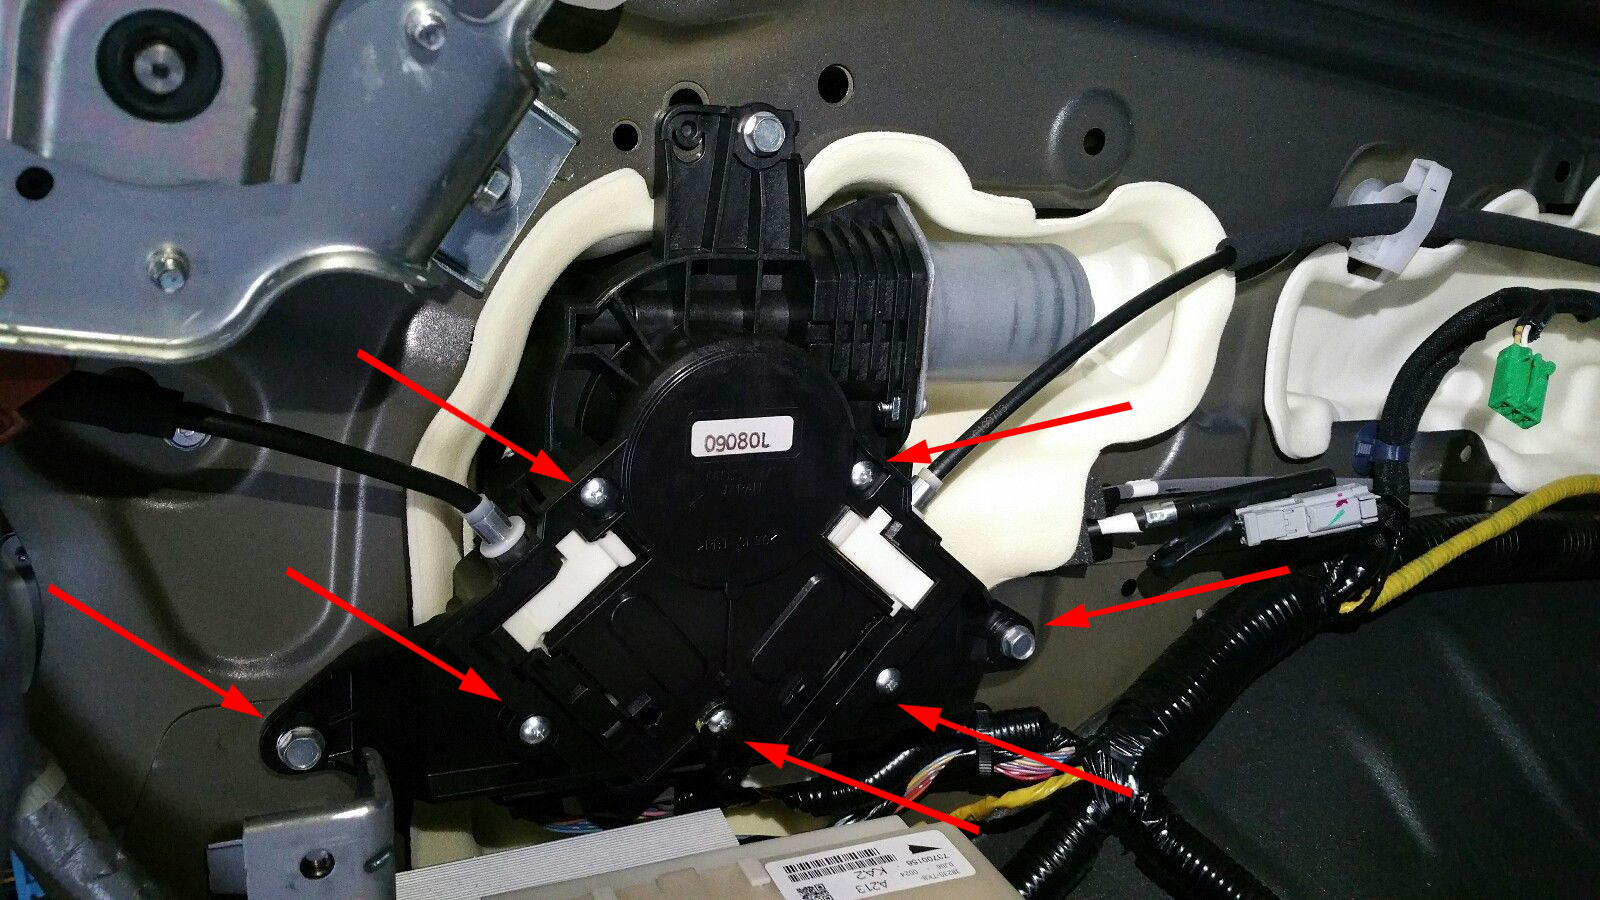
Disconnect the power and remove the the cover from the screws noted by arrows in the picture below.
PLEASE NOTE WHICH CABLE IS THE LONG ONE AND THE SHORT ONE AND WHICH DIRECTION THEY GO. THIS IS CRITICAL.
We recommend taking a picture. Different year Honda Odyssey’s have the long going to the front or the rear and a picture will assist you in the your work.

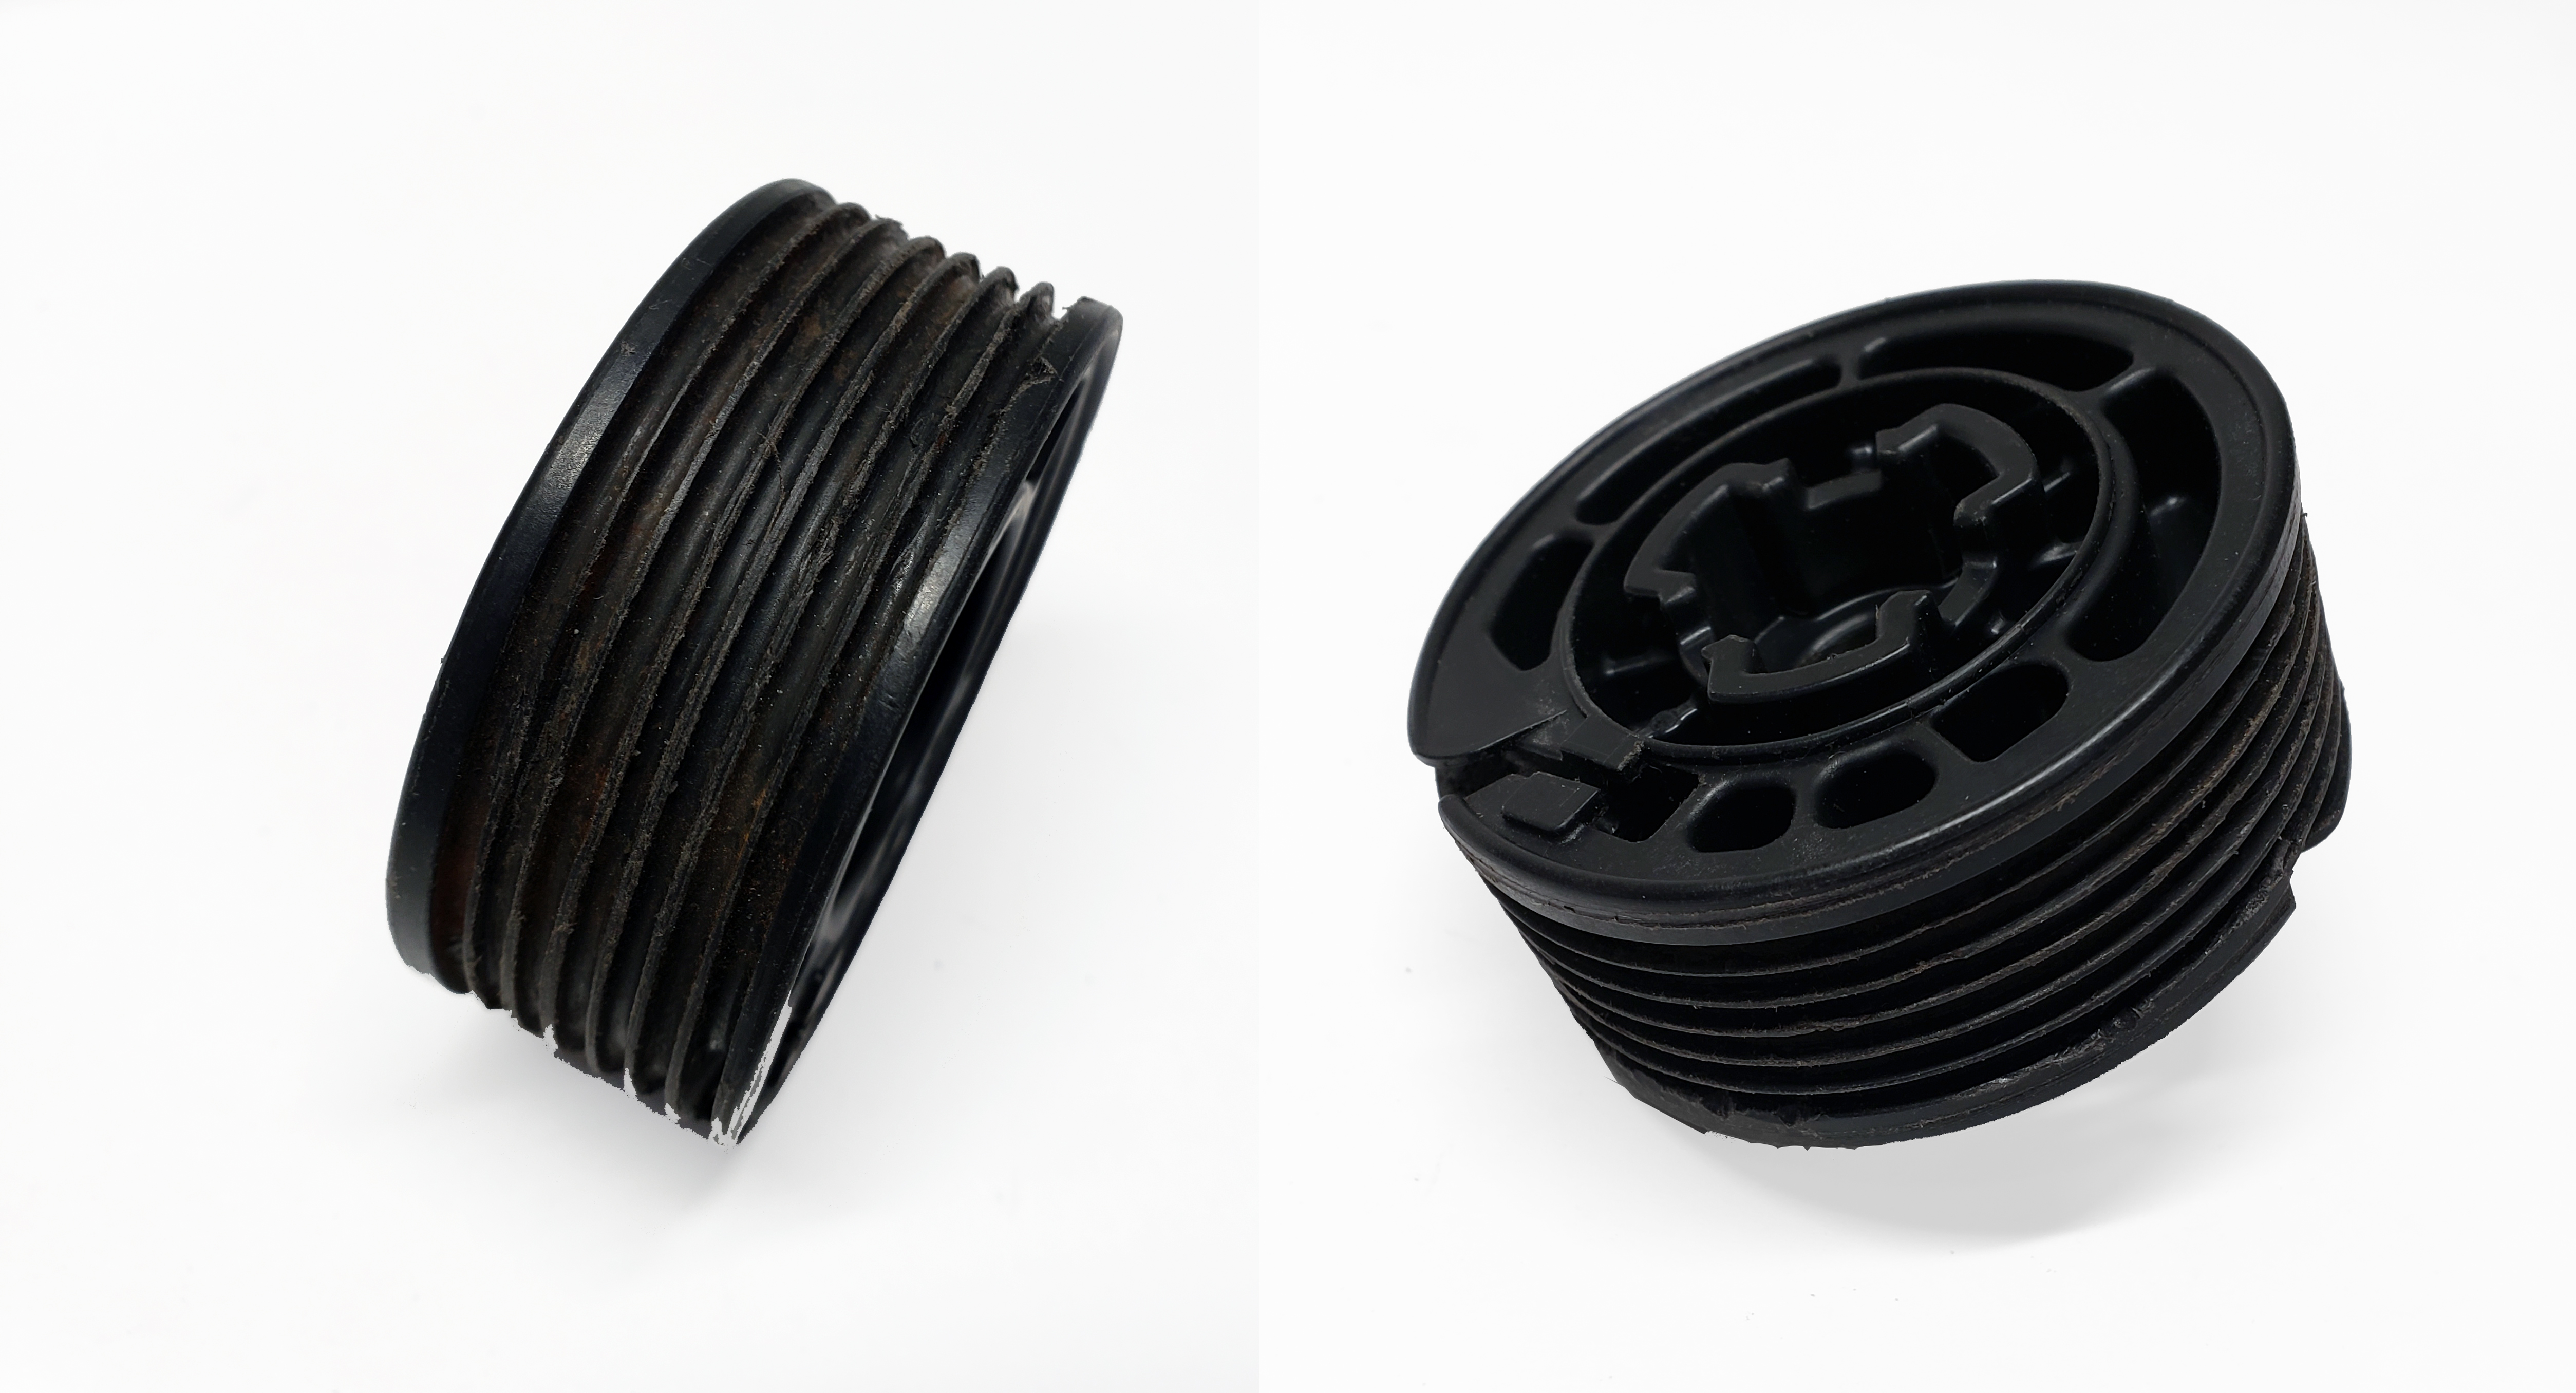
Cut the broken and damaged cables out. If there is slight damage to the pulley it can be cleaned up with a razor blade. Cut only a little at a time and remove only the material in the channels of the pulley.

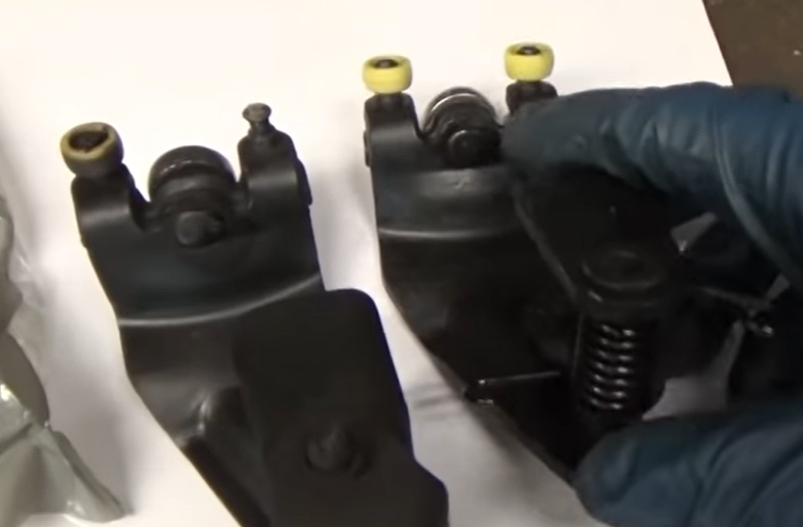
Remove the pulley and housings. Inspect for damage.
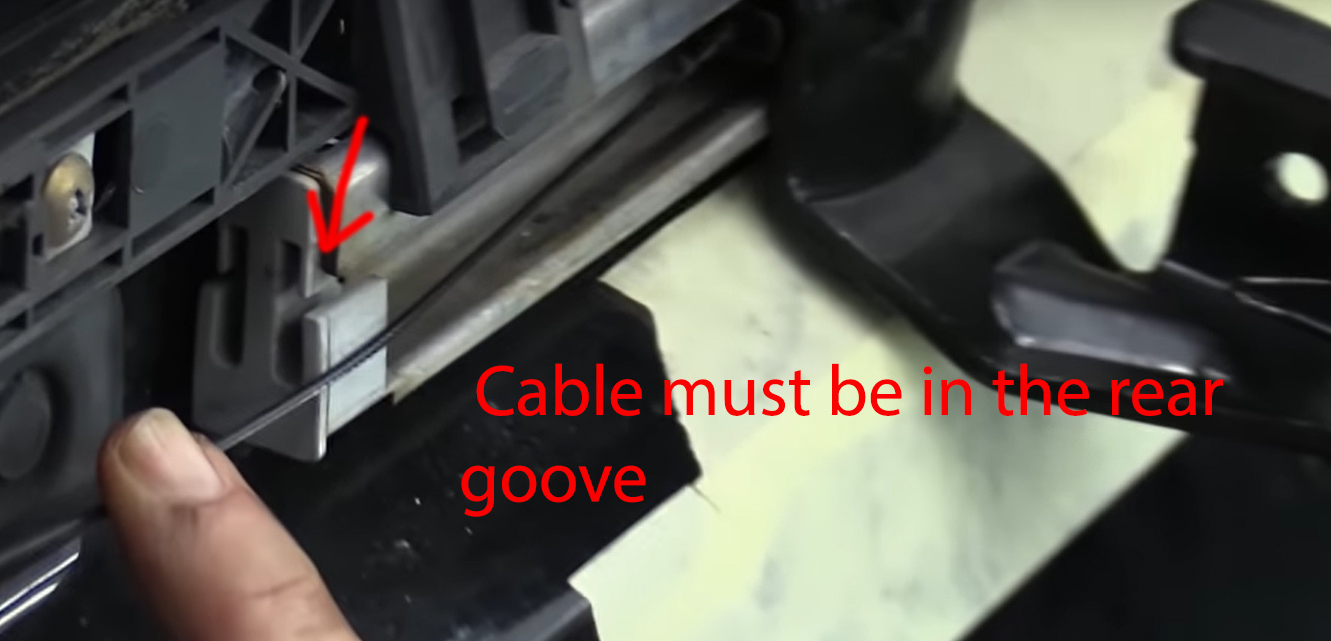
Jacking the sliding door is recommended and you can remove the bracket and access the other ends. We have spoken with the mechanic Eric the Car Guy (ETCG1) and he has given us permission to use his video as reference. If the bracket is damaged, we recommend replacing with factory part or the link we provided, we have tested others and they are not as durable.
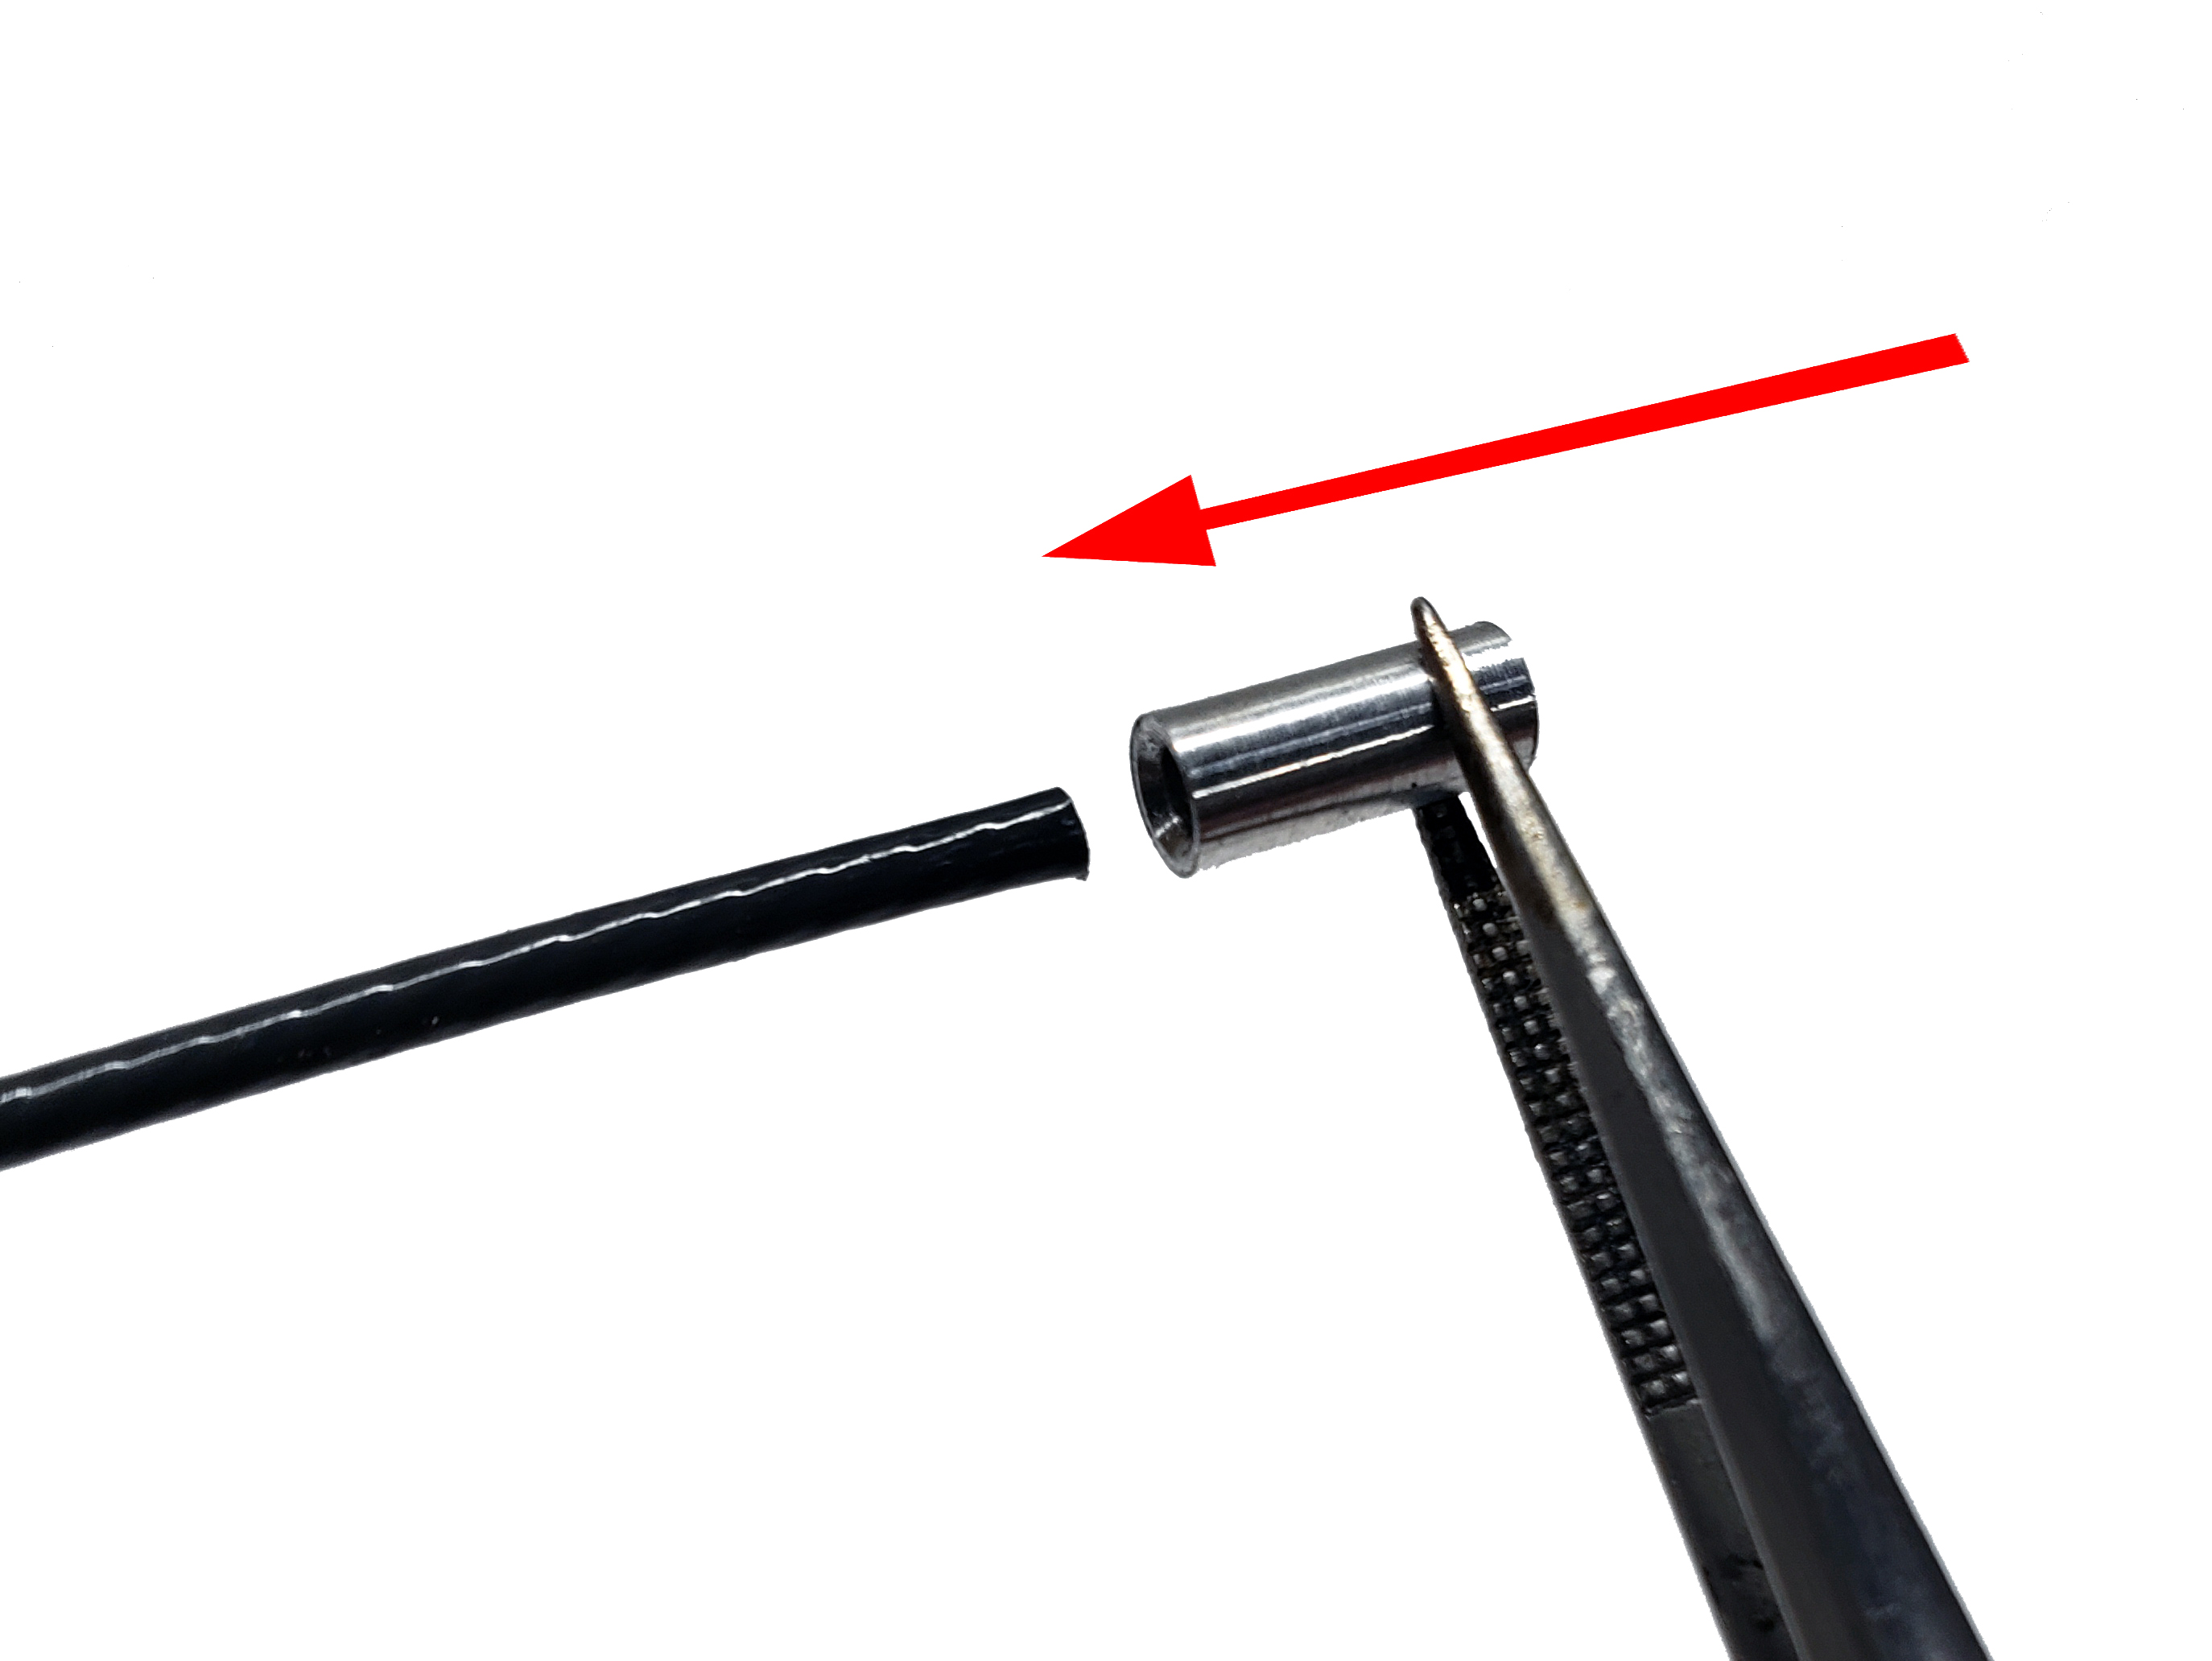
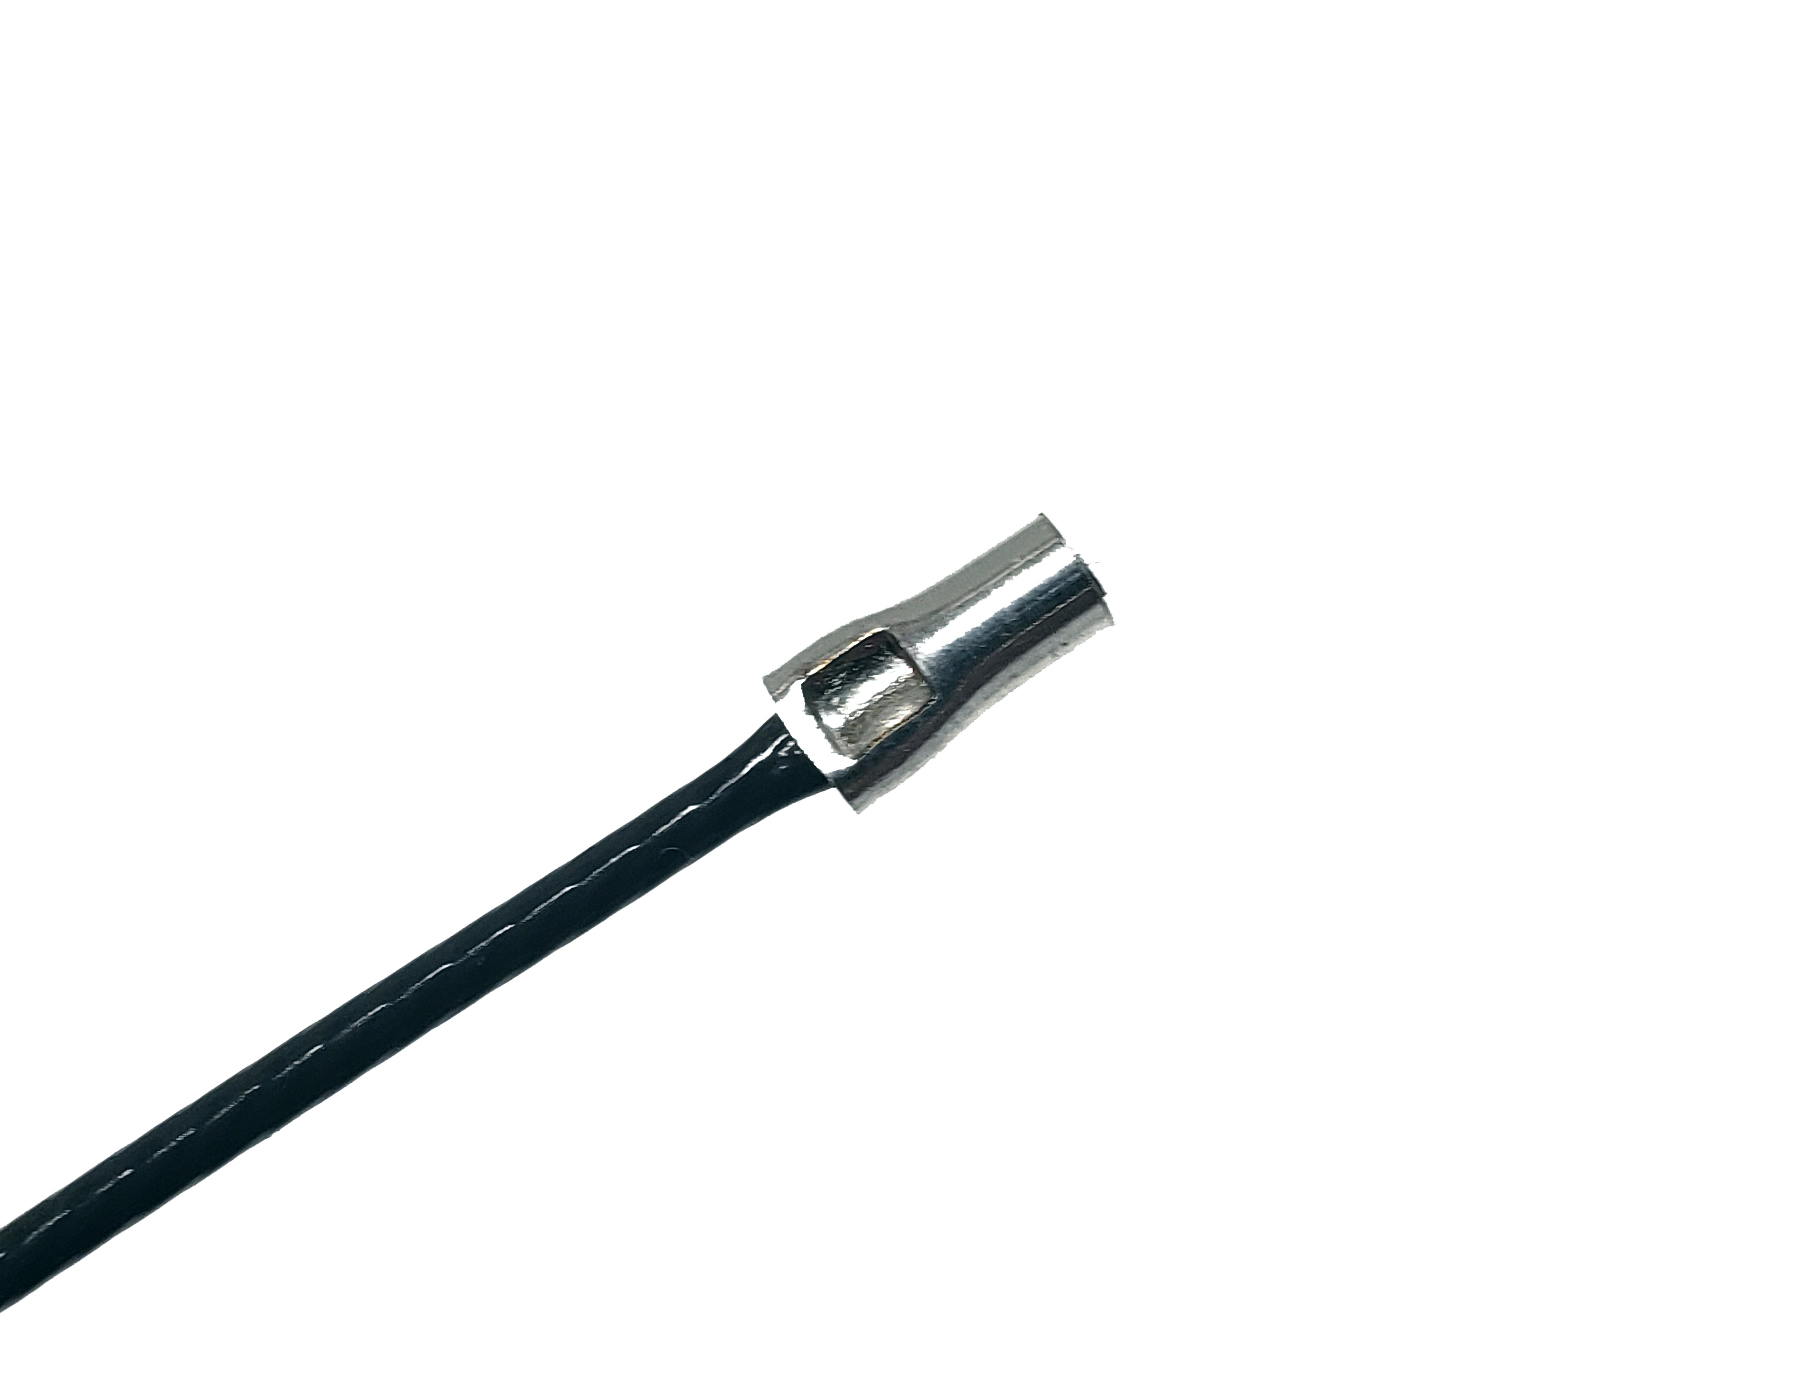
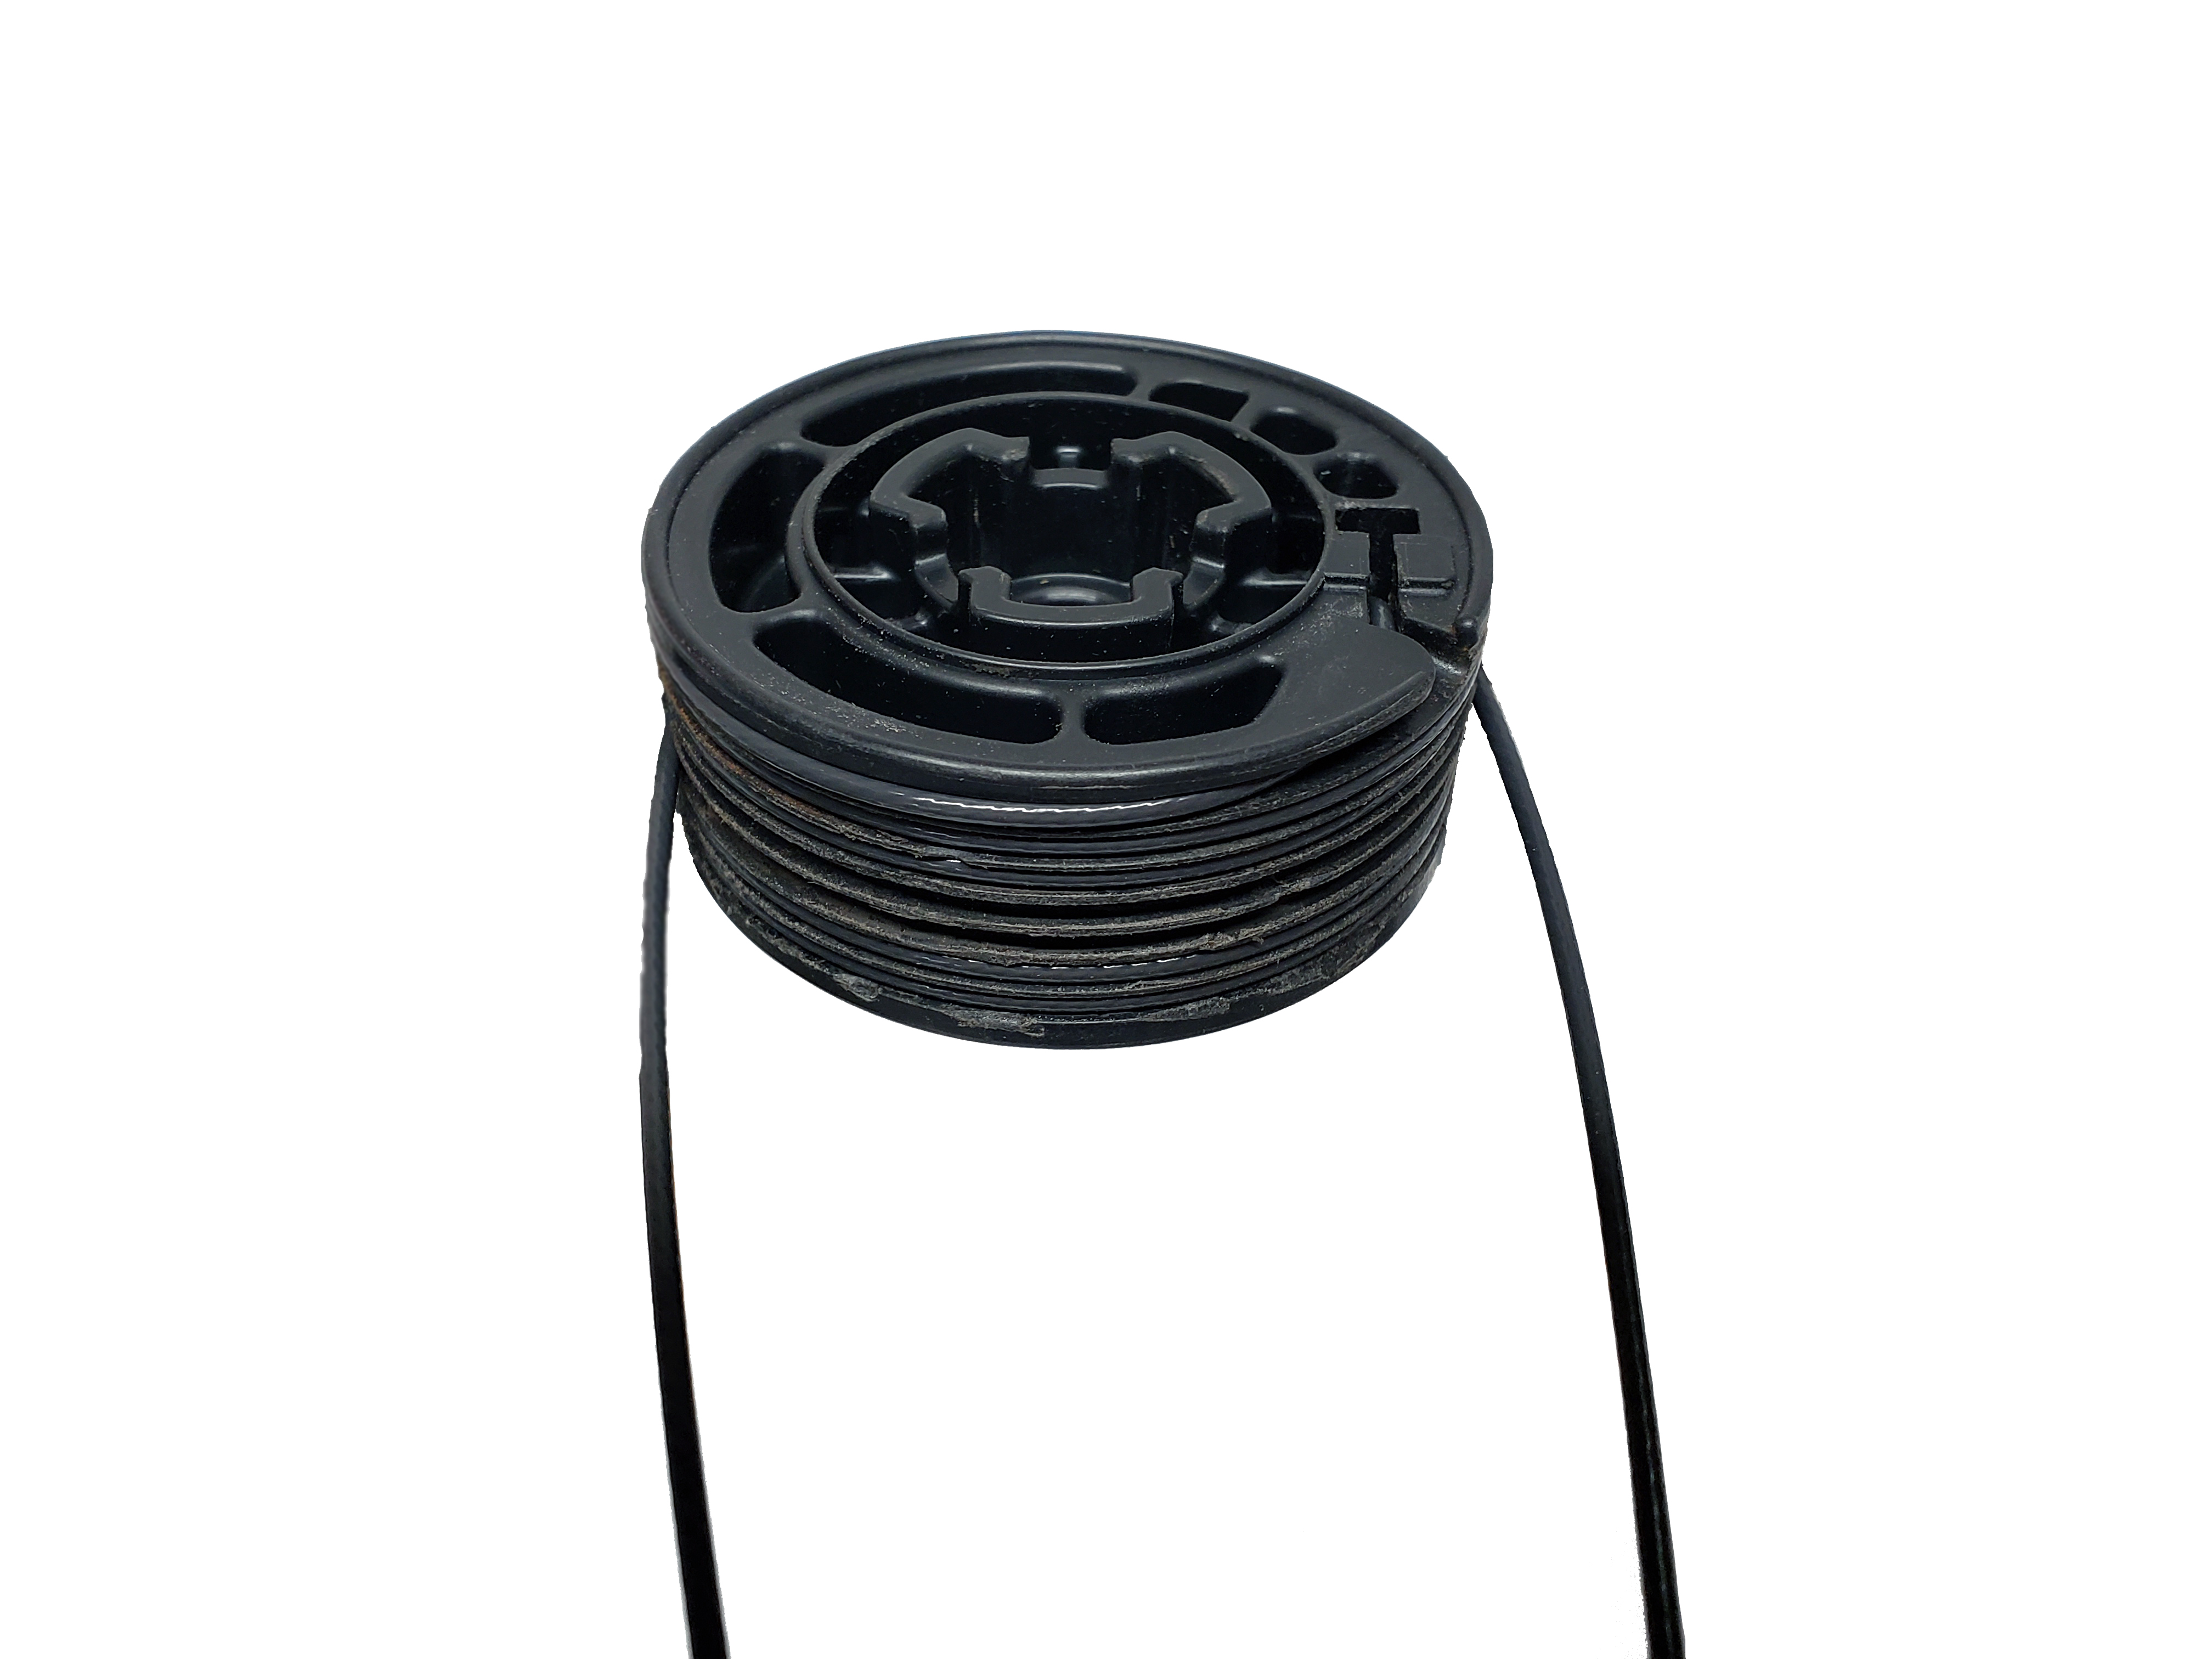
Put any bushings removed from the original cables at the door bracket back on the new cables and thread the cables into the housings.
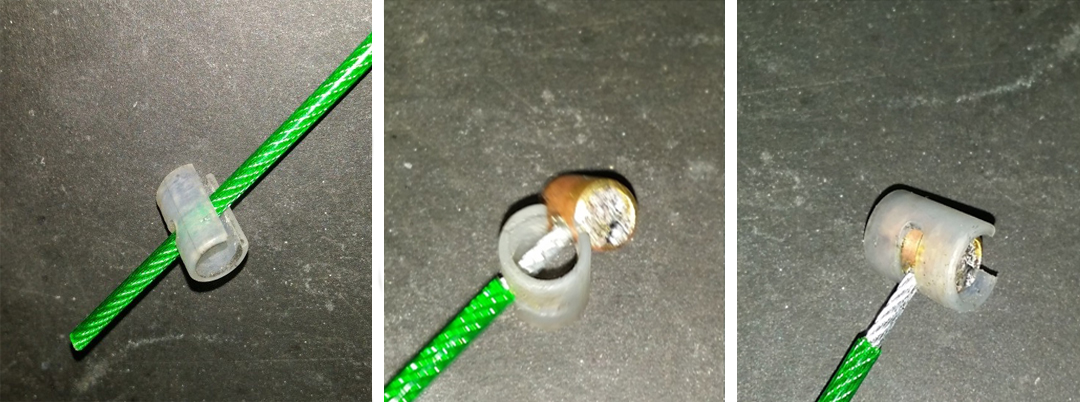
Put any bushings removed from the original cables at the door bracket back on the new cables and thread the cables into the housings.
The short cable goes through the back and the long cable goes through the front.
 >
>
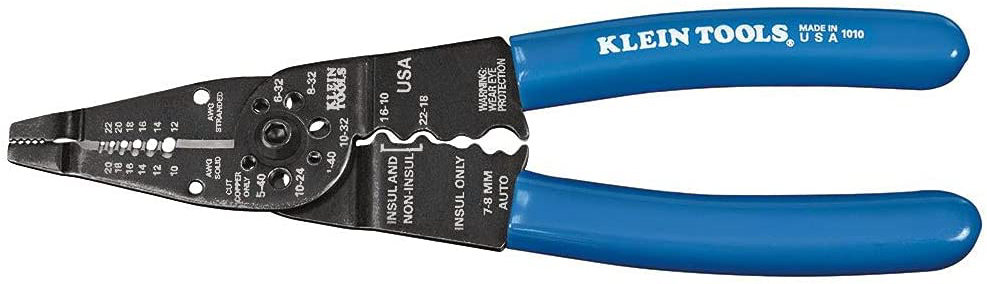
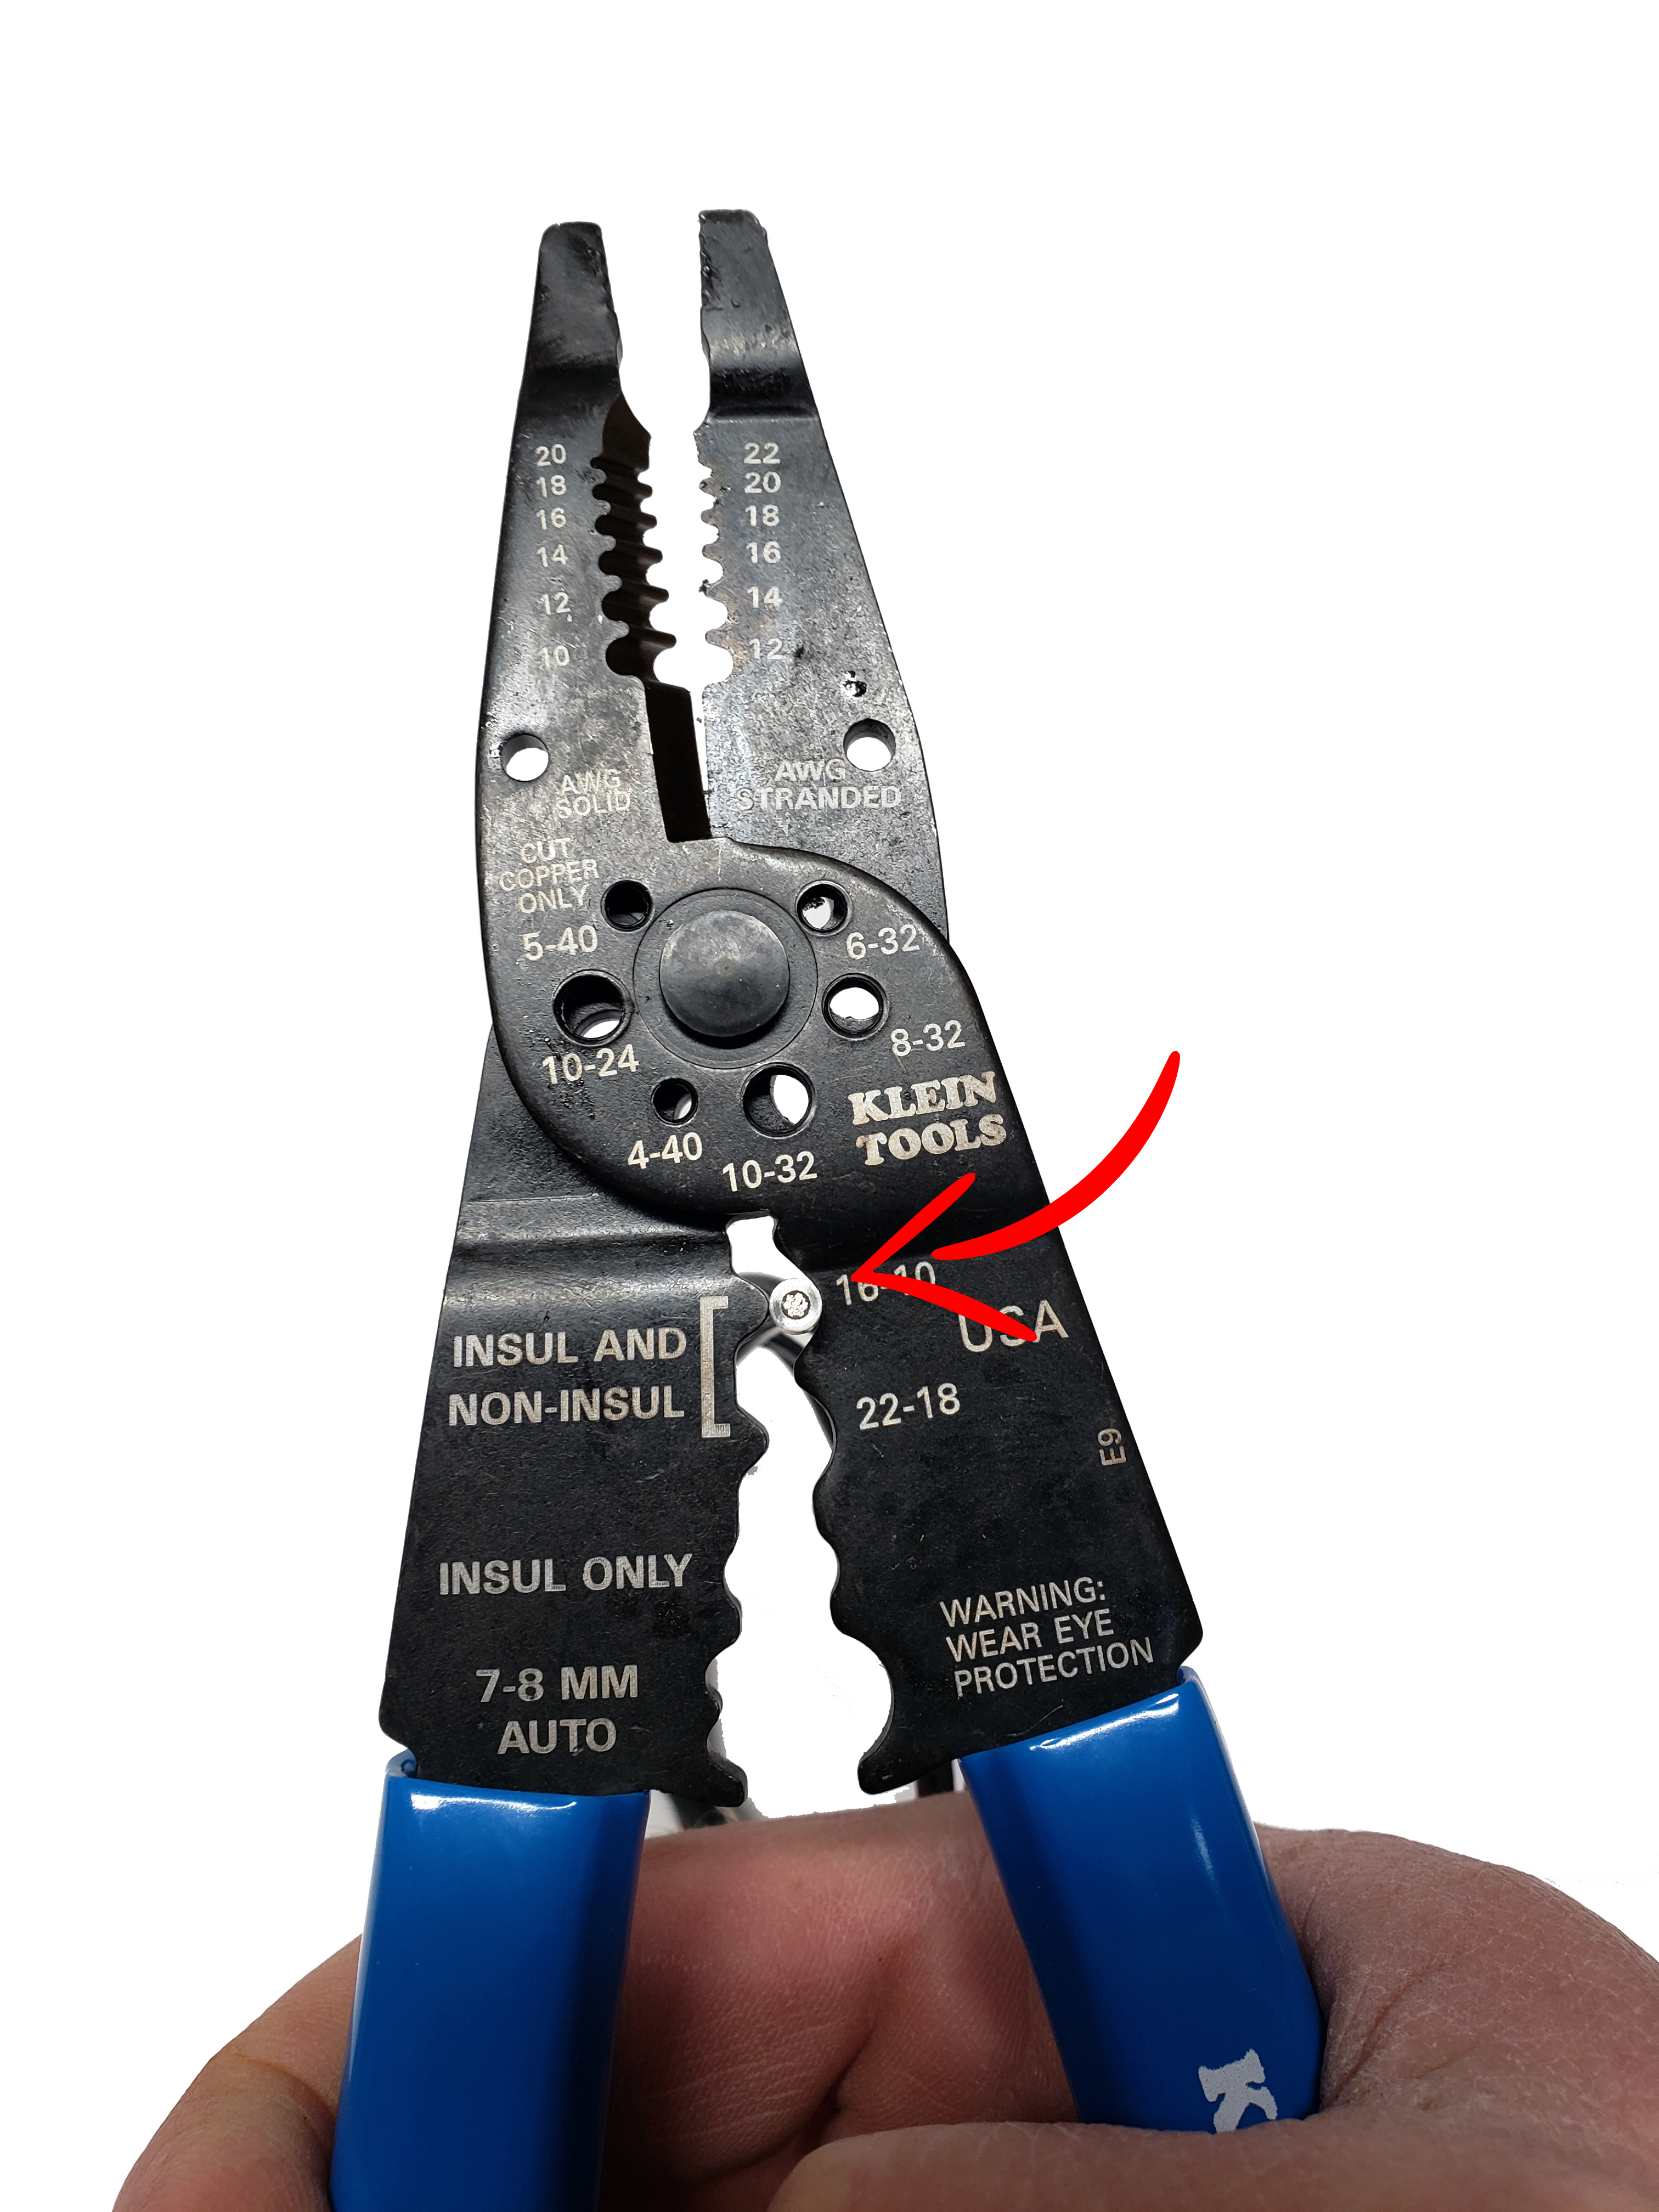
We recommend the Klein Long-Nose Multi-Purpose 1010 Tool. We have no affiliation with Klein, but their warranty is similar to ours and we use them in our business. We selected it because they have the ability to apply more pressure on the ferrule, but you must use a very hard squeeze.
We do NOT Recommend the tool type below. If the crimping area is on the tip of and it does not have a cam system, the crimp may not be effective.
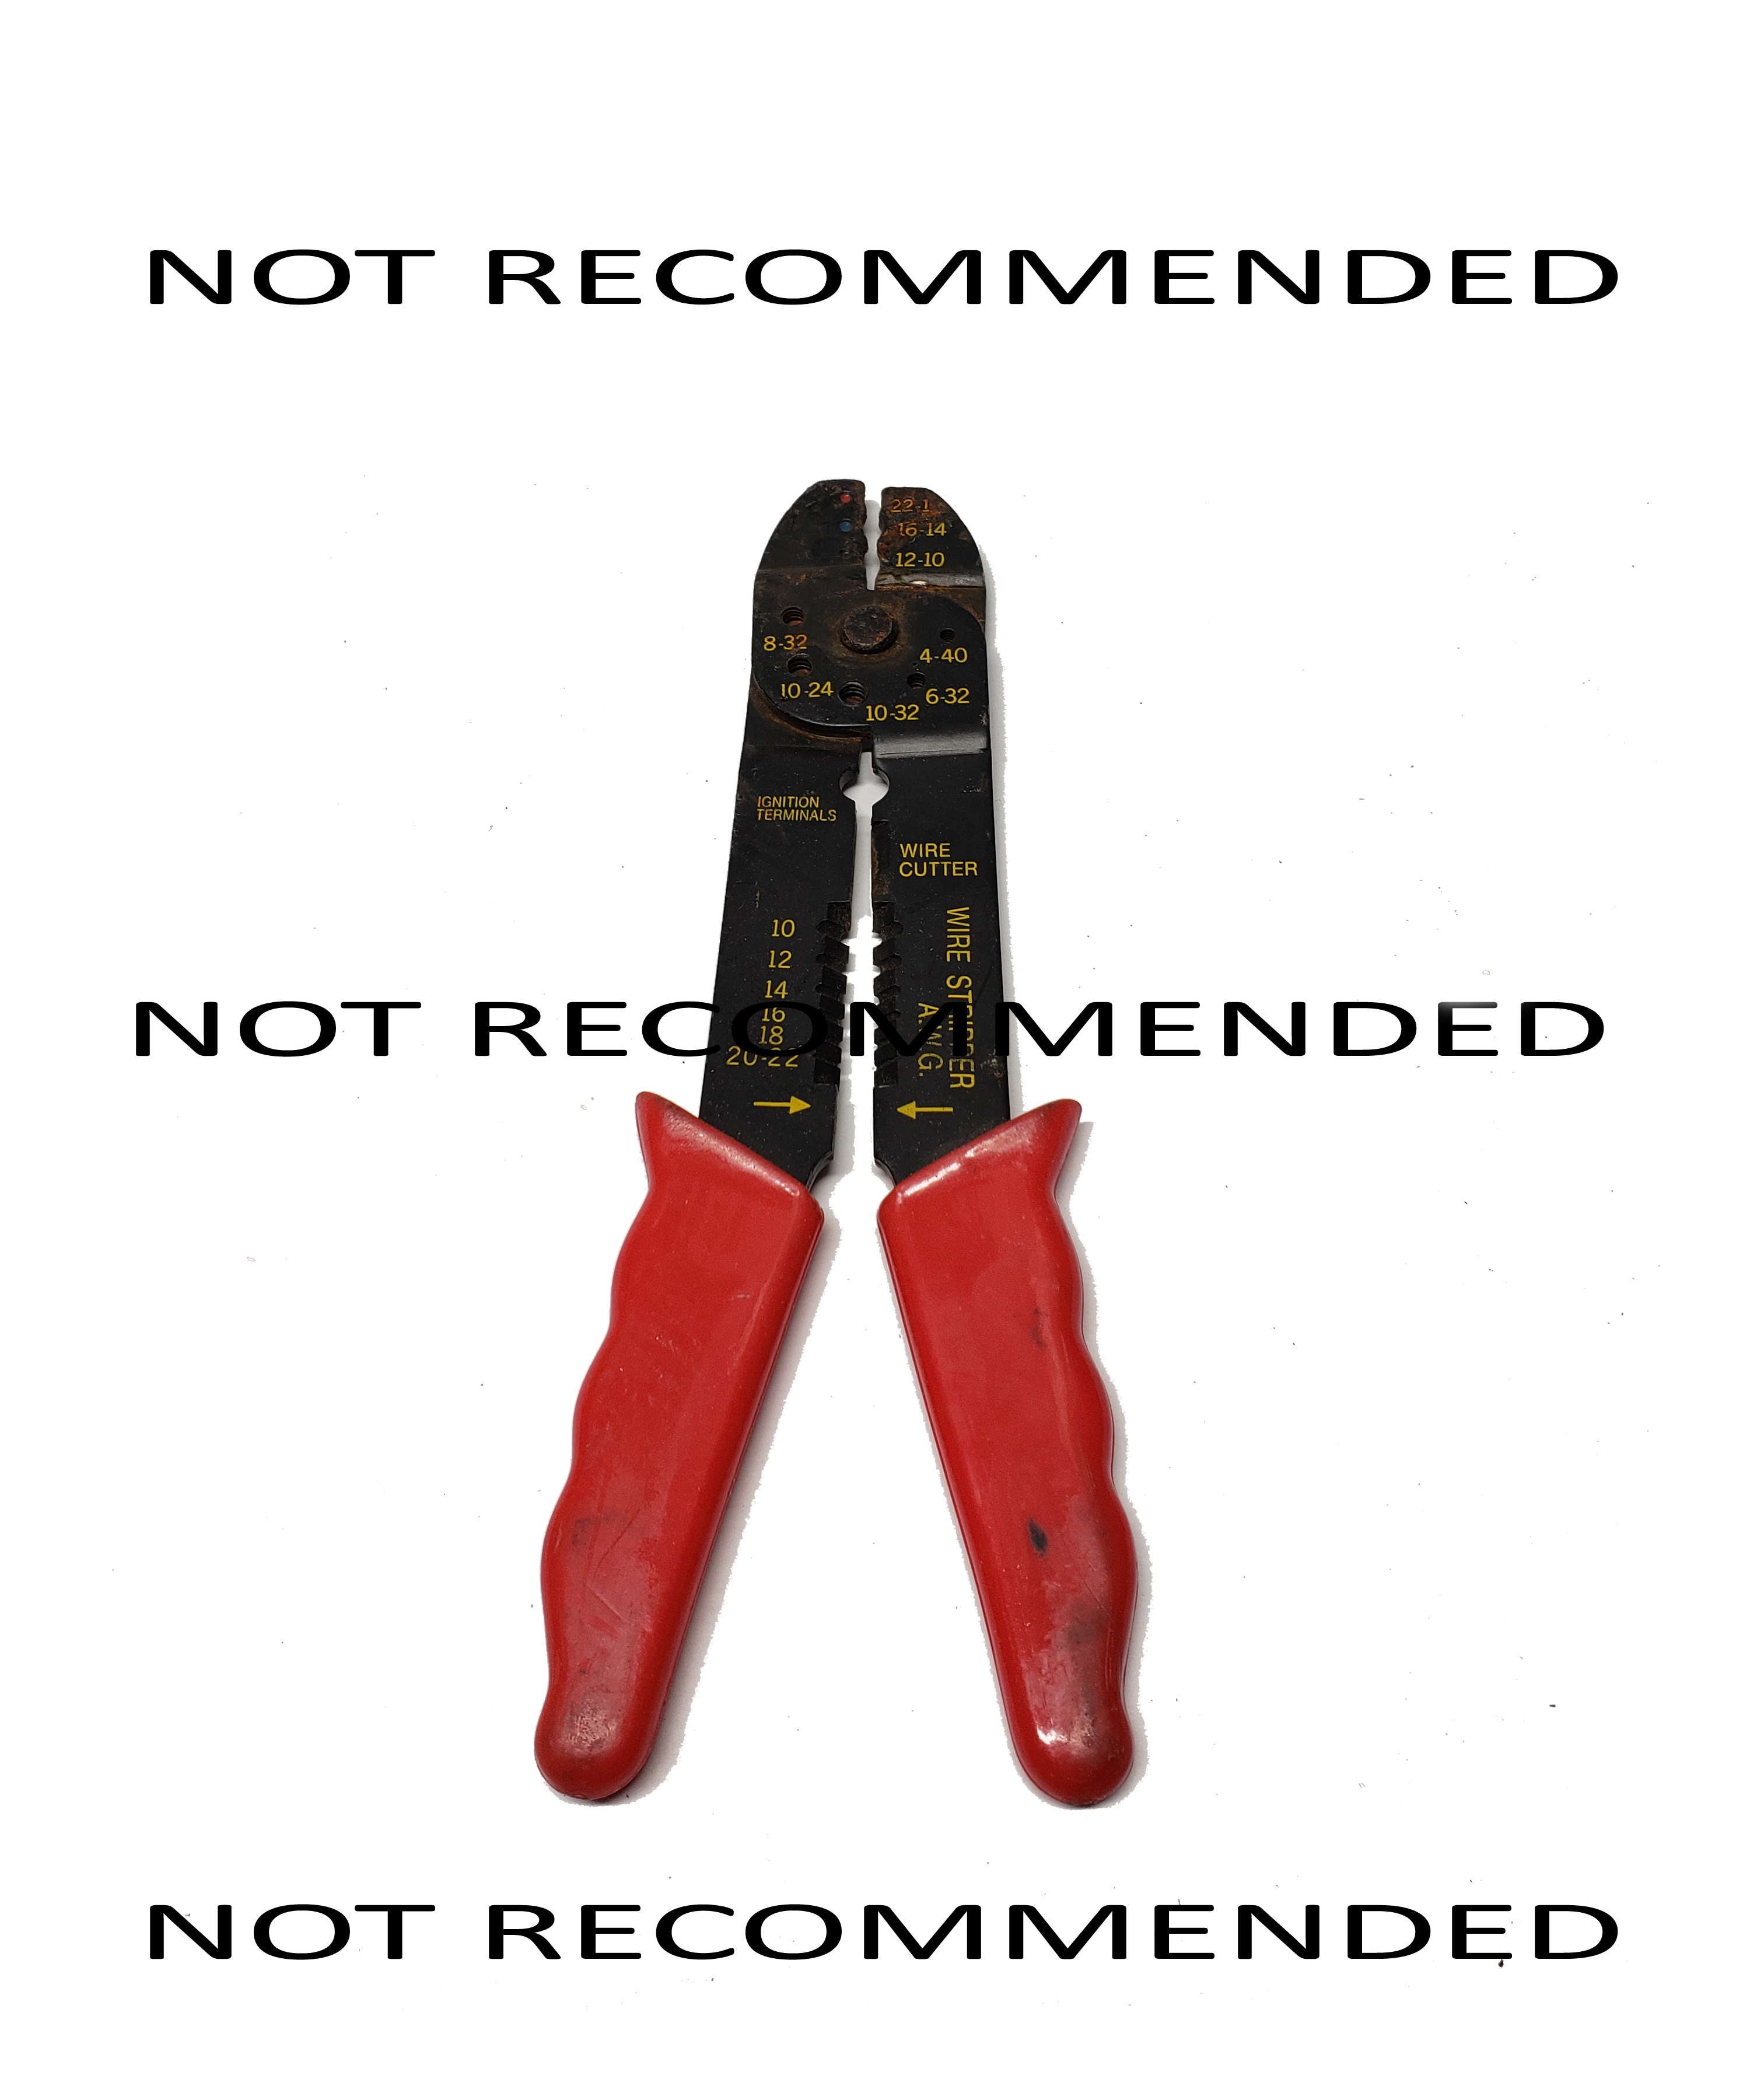
The above type is not recommended because it will not put a tight enough crimp on the ferrule. The SQUARE crimp type is also not recommended as it will not put enough force in the crimp.
Once the cables are threaded through the pulley and housings and the ferrules are attached, put the housings back into the motor and insert the ends into the pulley. Note the direction of the long versus the short cable housing in the picture you should have taken before starting.
Once you have the cable wound around the pulley and installed in the motor check the tension and have another person to manually open close the door while you observe the movement and check for slack. The automatic tensioners will remove most of the slack, but you may have to rewind the pulley one more time to get any additional slack out. Ensure the door fully opens and closes manually.
When your door manually opens and closes without issue, reconnect the power and hold the white tensioners in place while someone else activates the automatic door switch. Make sure to hold the tensioners so they do not come out of the motor unit.
YOU MUST HOLD THE TENSIONER IN OR PUT THE COVER BACK ON THE MOTOR OR THEY WILL POP OUT AND RUIN THE CABLES.


If the door operates normally put the motor cover back on in reverse order.
If your door does not fully close, you may need to home the door. This is because the computer thinks the door is closed by the number rotations of the pulley. You need to pull the fuse to the door and clock. Wait ten seconds put the fuse back in. Then at the dashboard door button (NOT THE FOB) hold the button close until the door fully closes and the locking mechanism engages. Your door is now homed and should operate properly.
72010-TK8-A12 R" is another tiny product line of TitanRCK